

s h o r t f o l i o . . .
Sunday, June 28, 2015
Monday, June 22, 2015

Wednesday, June 17, 2015
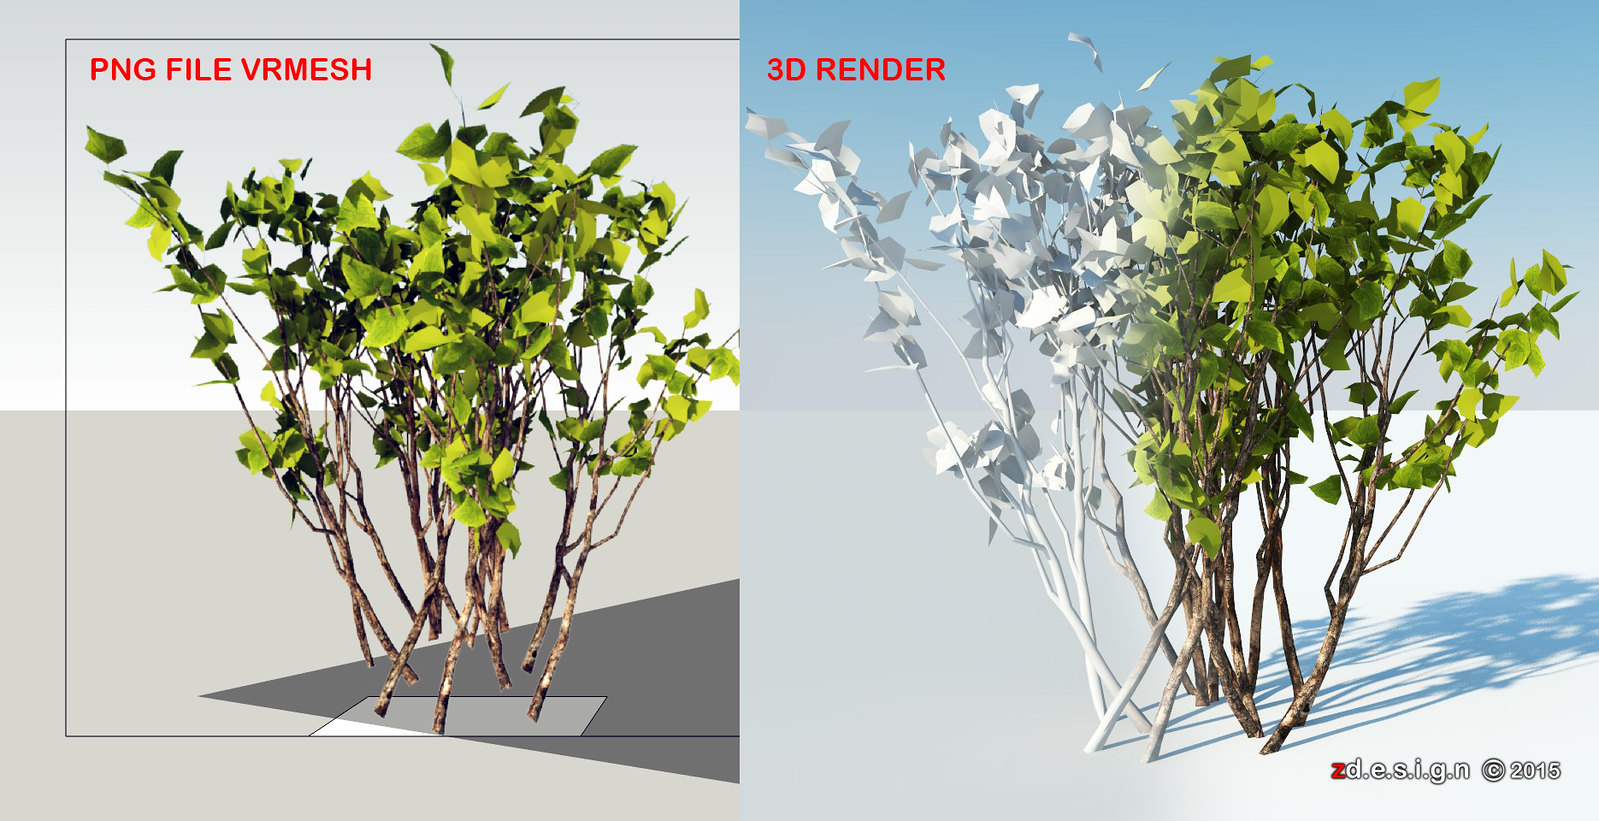
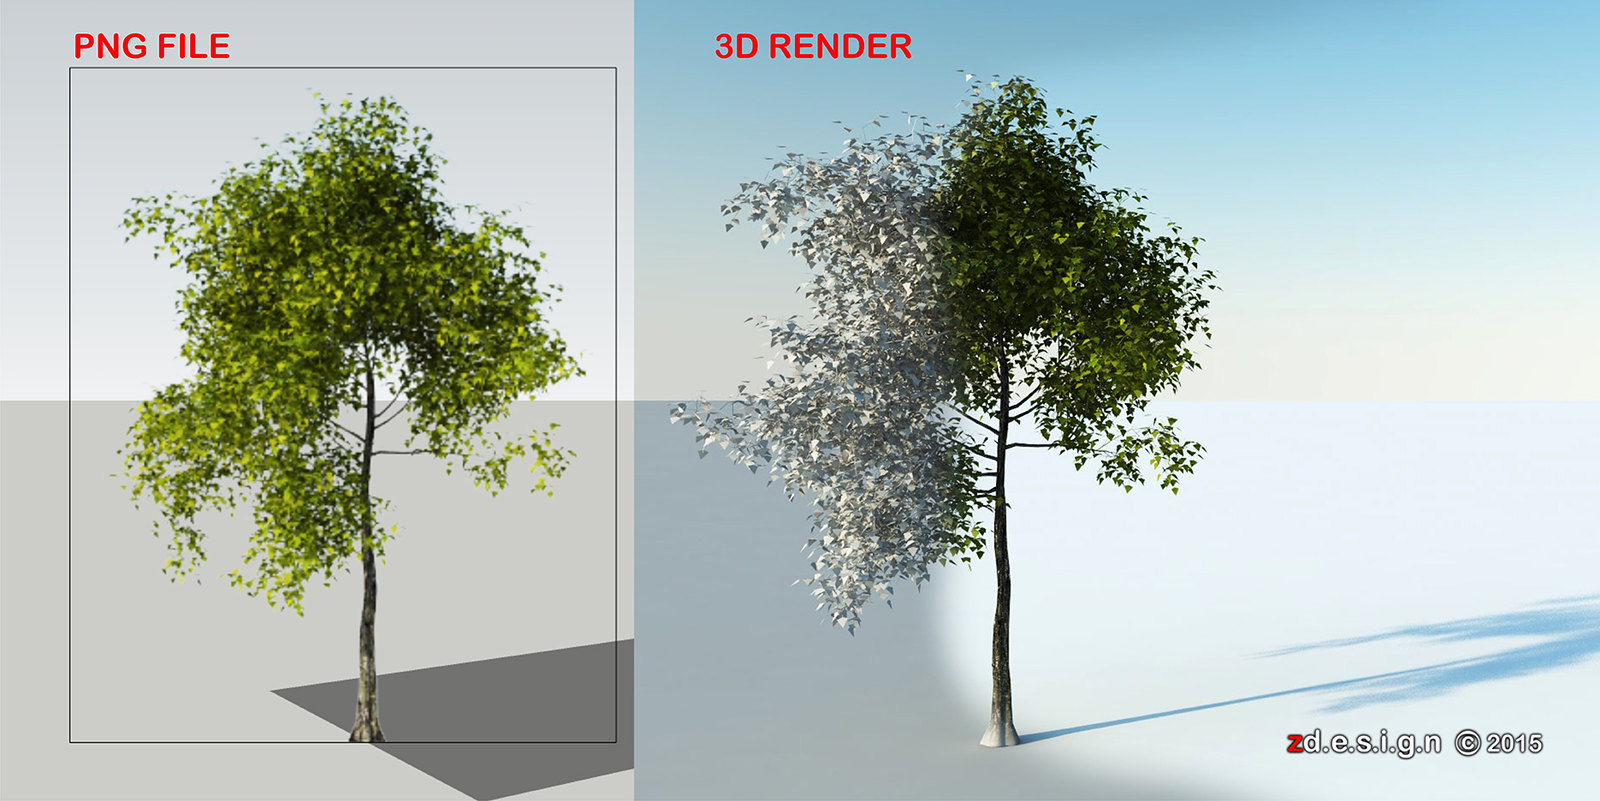
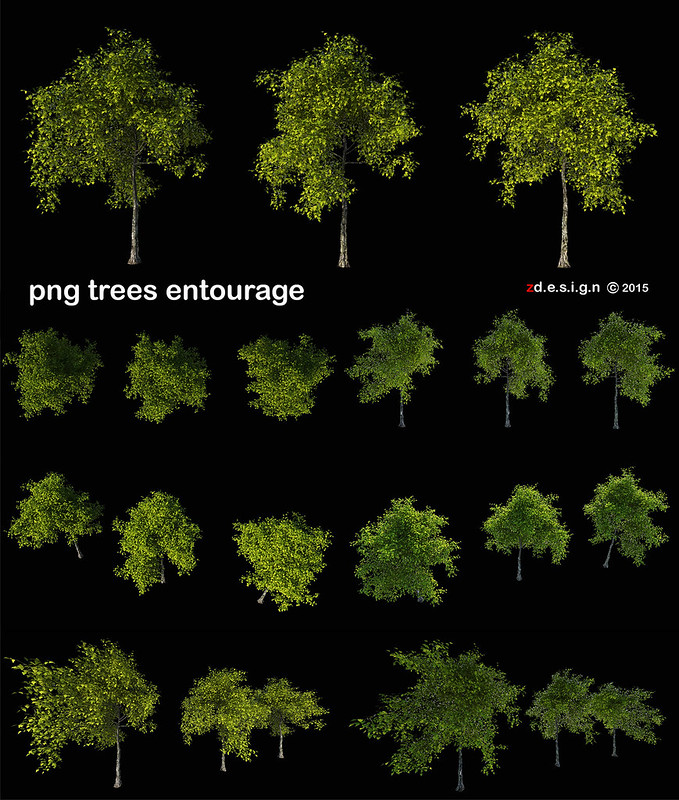
PNG_VRMESH FILE_iTrees-01-GenericTree_00 . . .
I try to replace vrmesh file into png file componets facing camera and to be rendered in 3d
Monday, June 15, 2015

Sunday, May 31, 2015
S O R R Y . . .
SORRY
FOR NOT RELEASING SOME OF MY BLOG IMAGES, THE IMAGES EXCEEDS BANDWIDTH
WITH TOO MANY VIEWS...JUST WAIT FOR A COUPLE OF WEEKS UNTIL IT WILL
RETURN AGAIN.
MANY THANK'S
ZDESIGN
Thursday, May 28, 2015
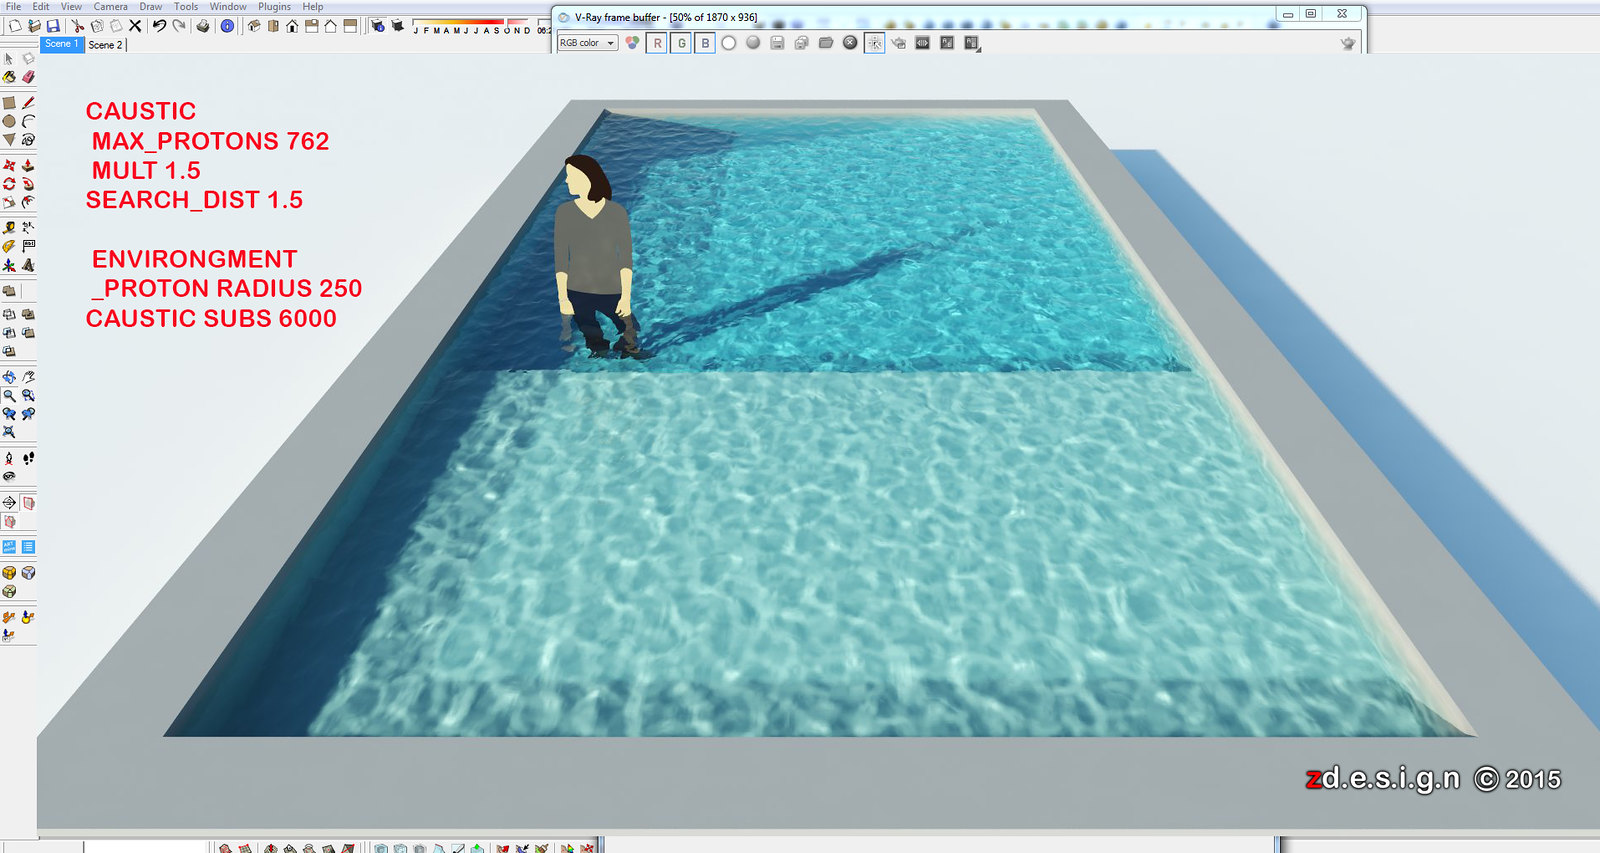
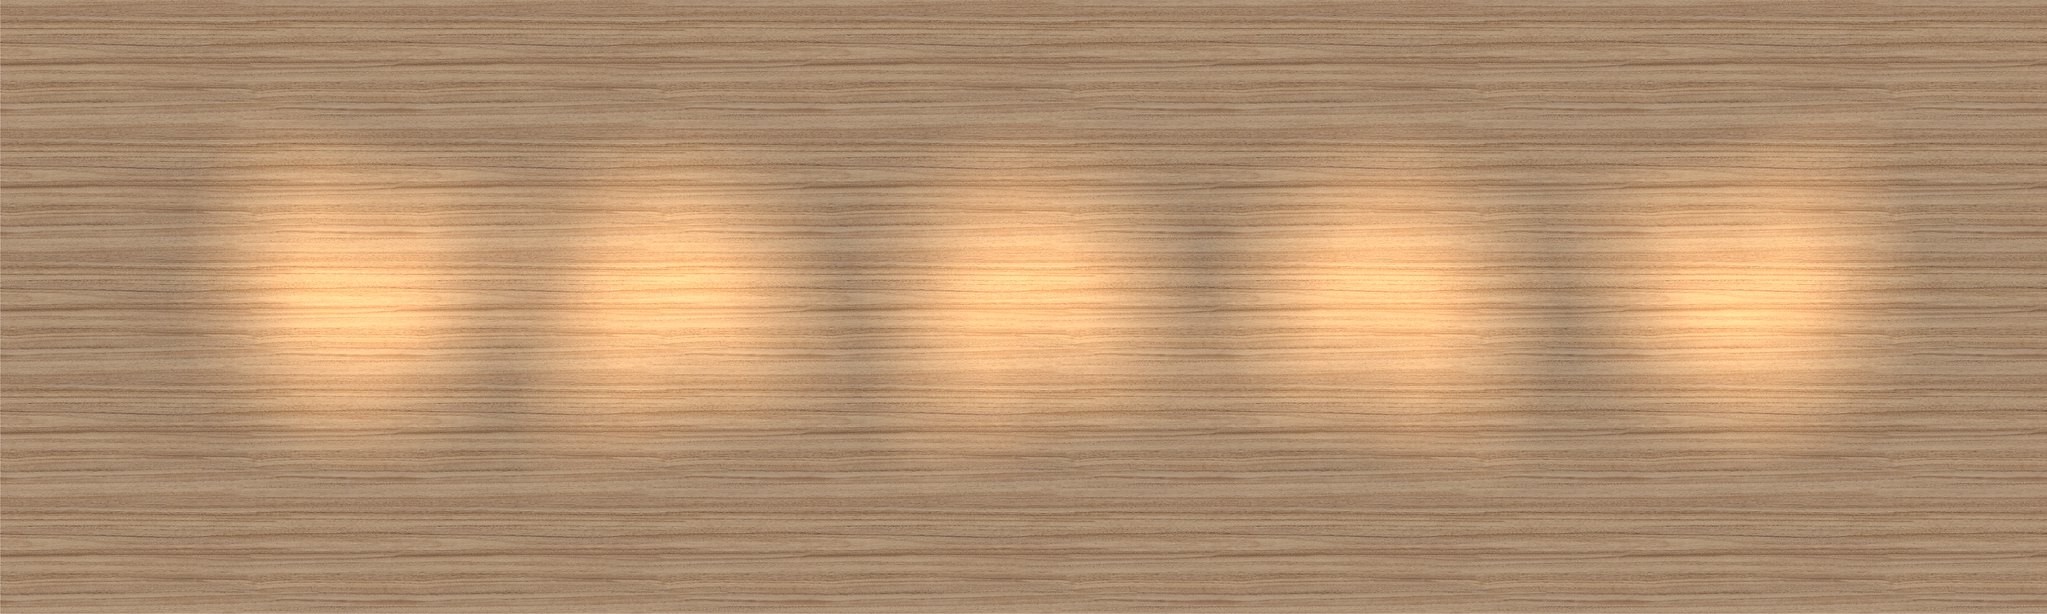
CAUSTIC WATER . . . Tutorial with Tips and trick :)
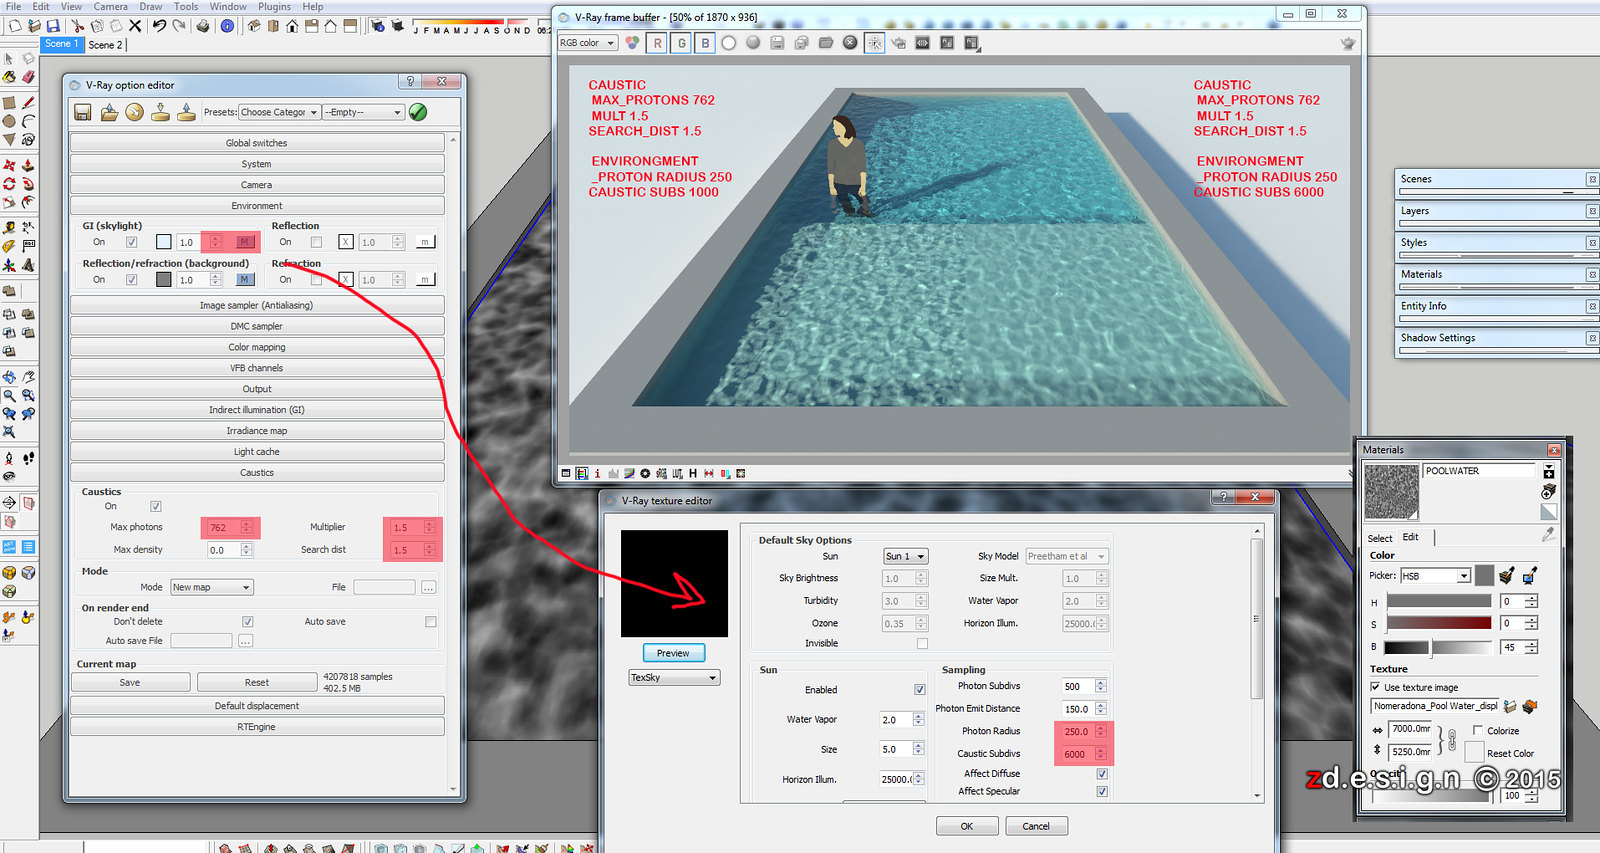
Here's my caustic version using mm. in sketchup since inches is the default unit. I use nomeradona's displacement texture here - many thanks sir nomer
From Default setting open vray option editor, adjust GI photon radius from 50 to 250 and caustic subs 1000 to 6000 open caustics change Max photons from 30 to 762, Multiplier from 1 to 1.5, and search dist from 20 down to 1.5 and I set my texture size in material editor 7000w x 5250h in mm. for more realistic caustic projection.
here's my sample image render using two different caustic subs
 sample image render using 4 different search distance
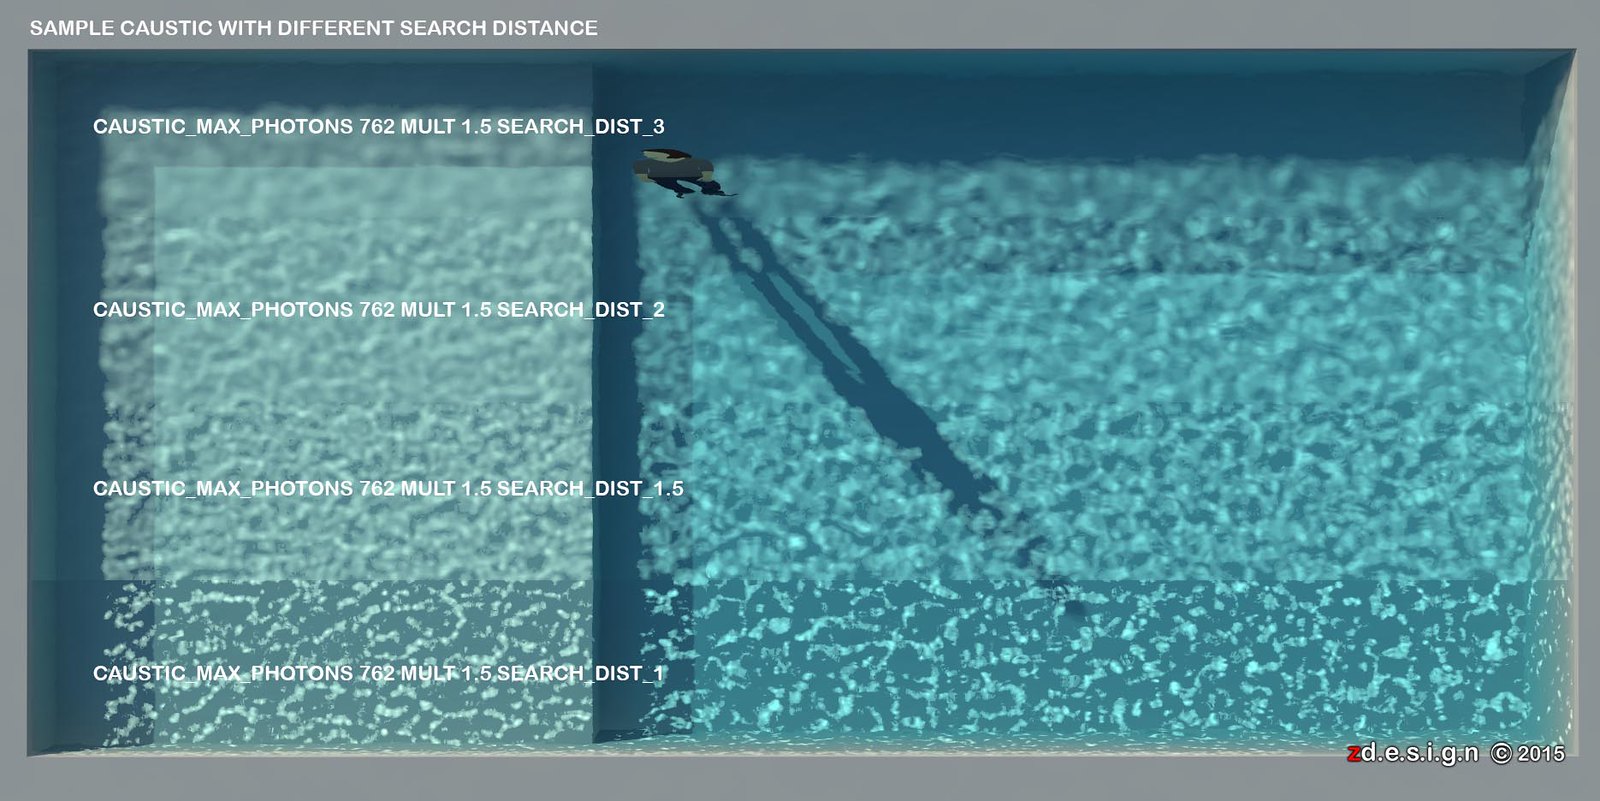
From Default setting open vray option editor, adjust GI photon radius from 50 to 250 and caustic subs 1000 to 6000 open caustics change Max photons from 30 to 762, Multiplier from 1 to 1.5, and search dist from 20 down to 1.5 and I set my texture size in material editor 7000w x 5250h in mm. for more realistic caustic projection.
here's my sample image render using two different caustic subs
sample image render using 4 different search distance
sample image render with good caustic setting (please correct me if i am wrong)
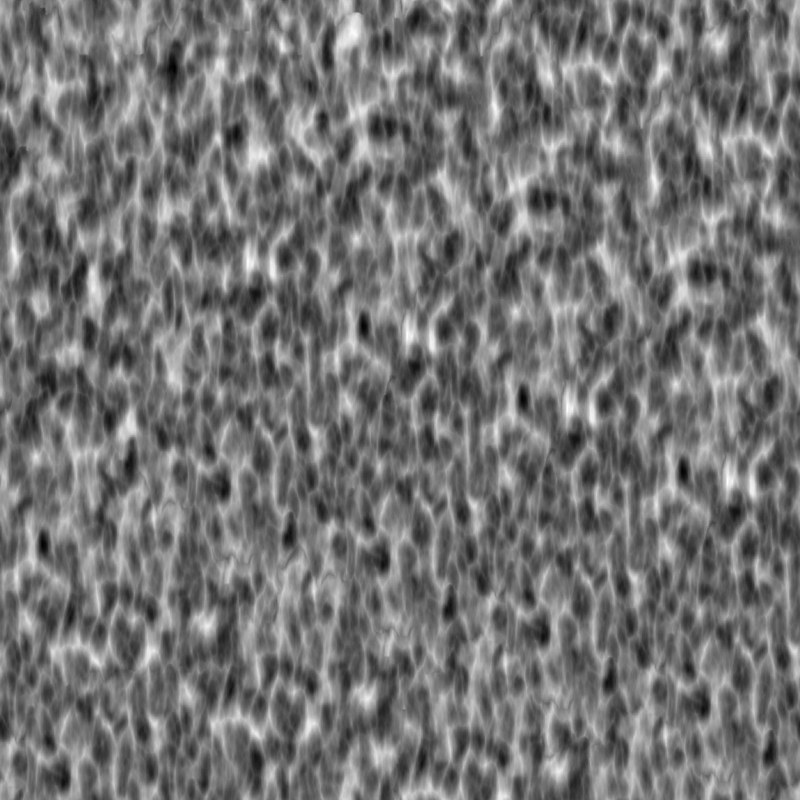
sample image displacement by nomeradona here
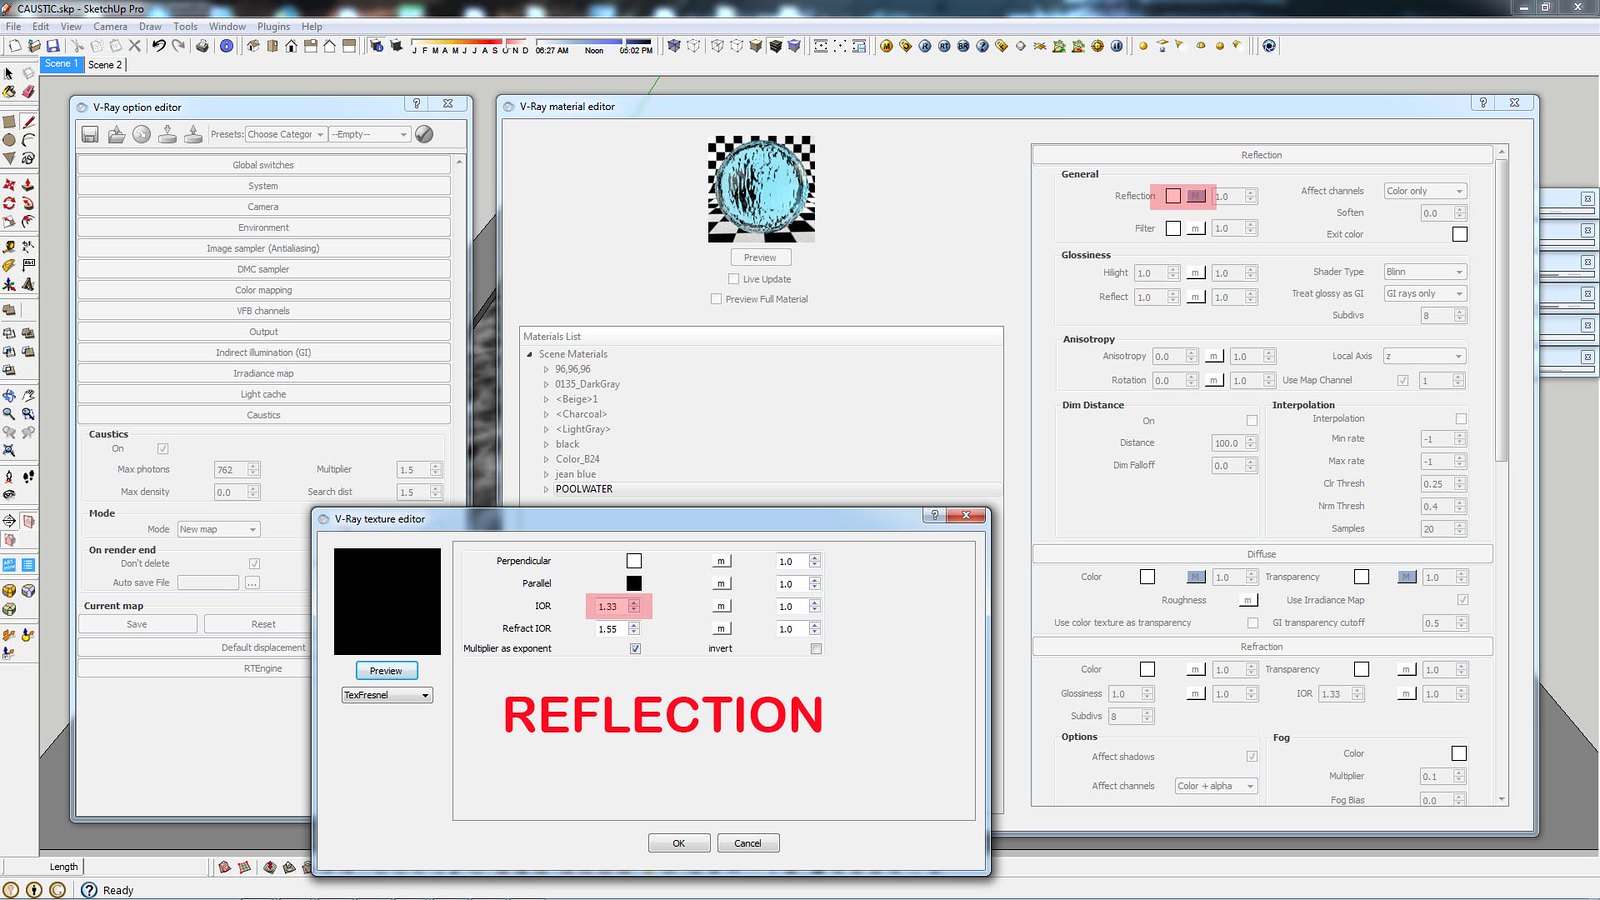
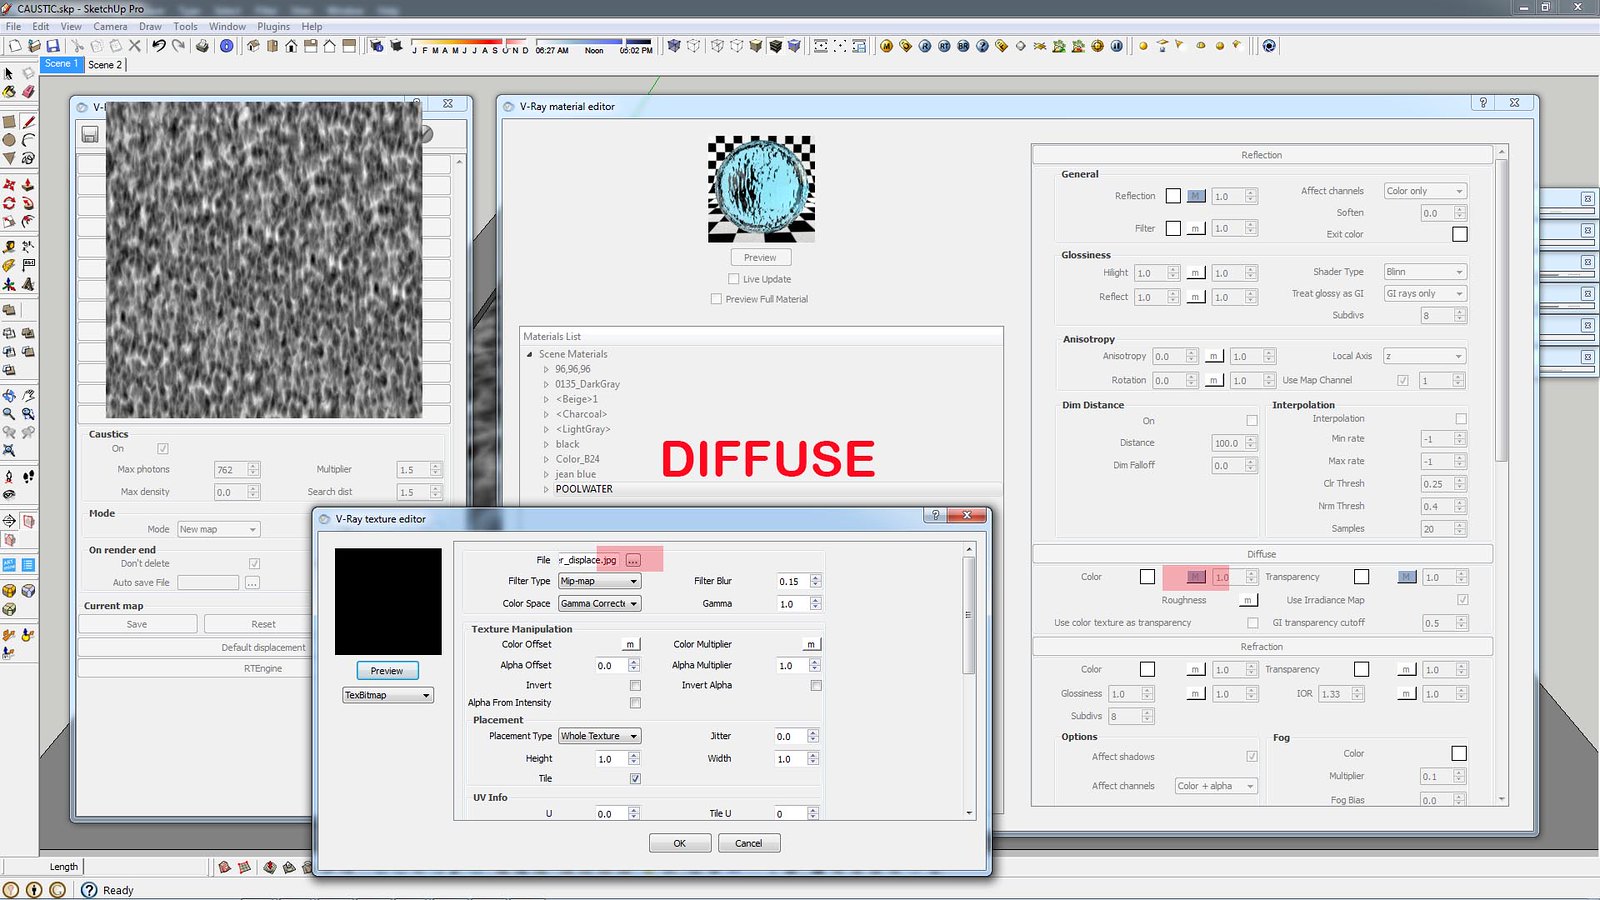
here's the trick using that same displacement - add reflection and set IOR 1.33
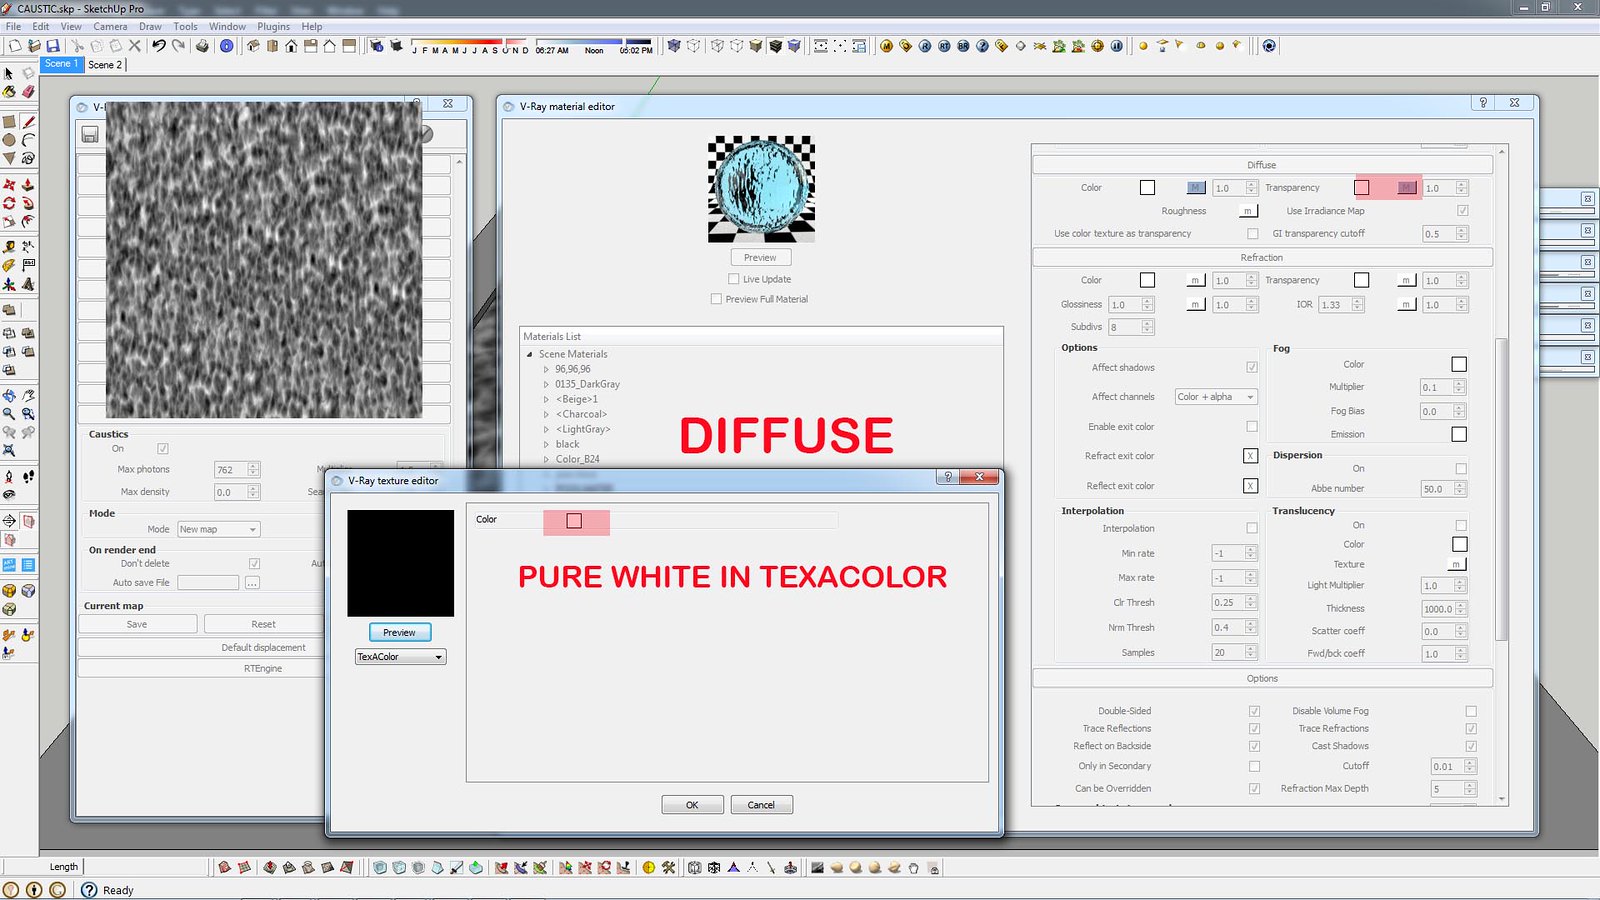
in diffuse layer M attached the displacement material by nomeradona
in transparency layer M attached texAcolor and change pure white
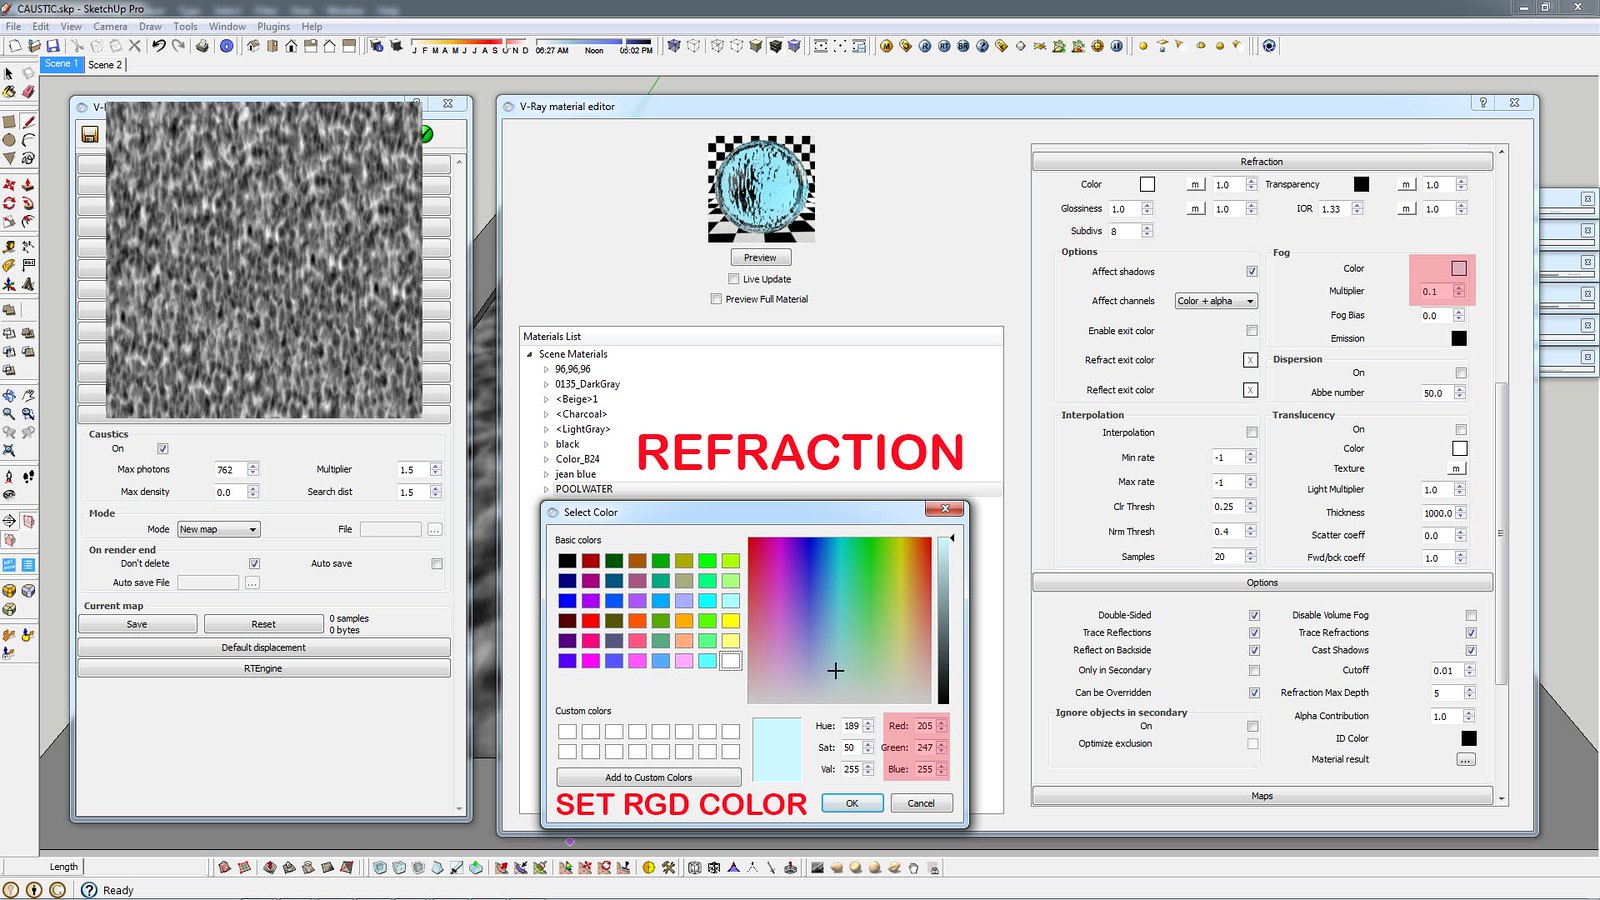
add refraction set IOR also 1.33 and set Fog color RGB 205,247,255 and change mult from 1 to 0.1 ( this is the tint color multiplier higher value produce darker color tint lower value produce lighter color tint ) :)
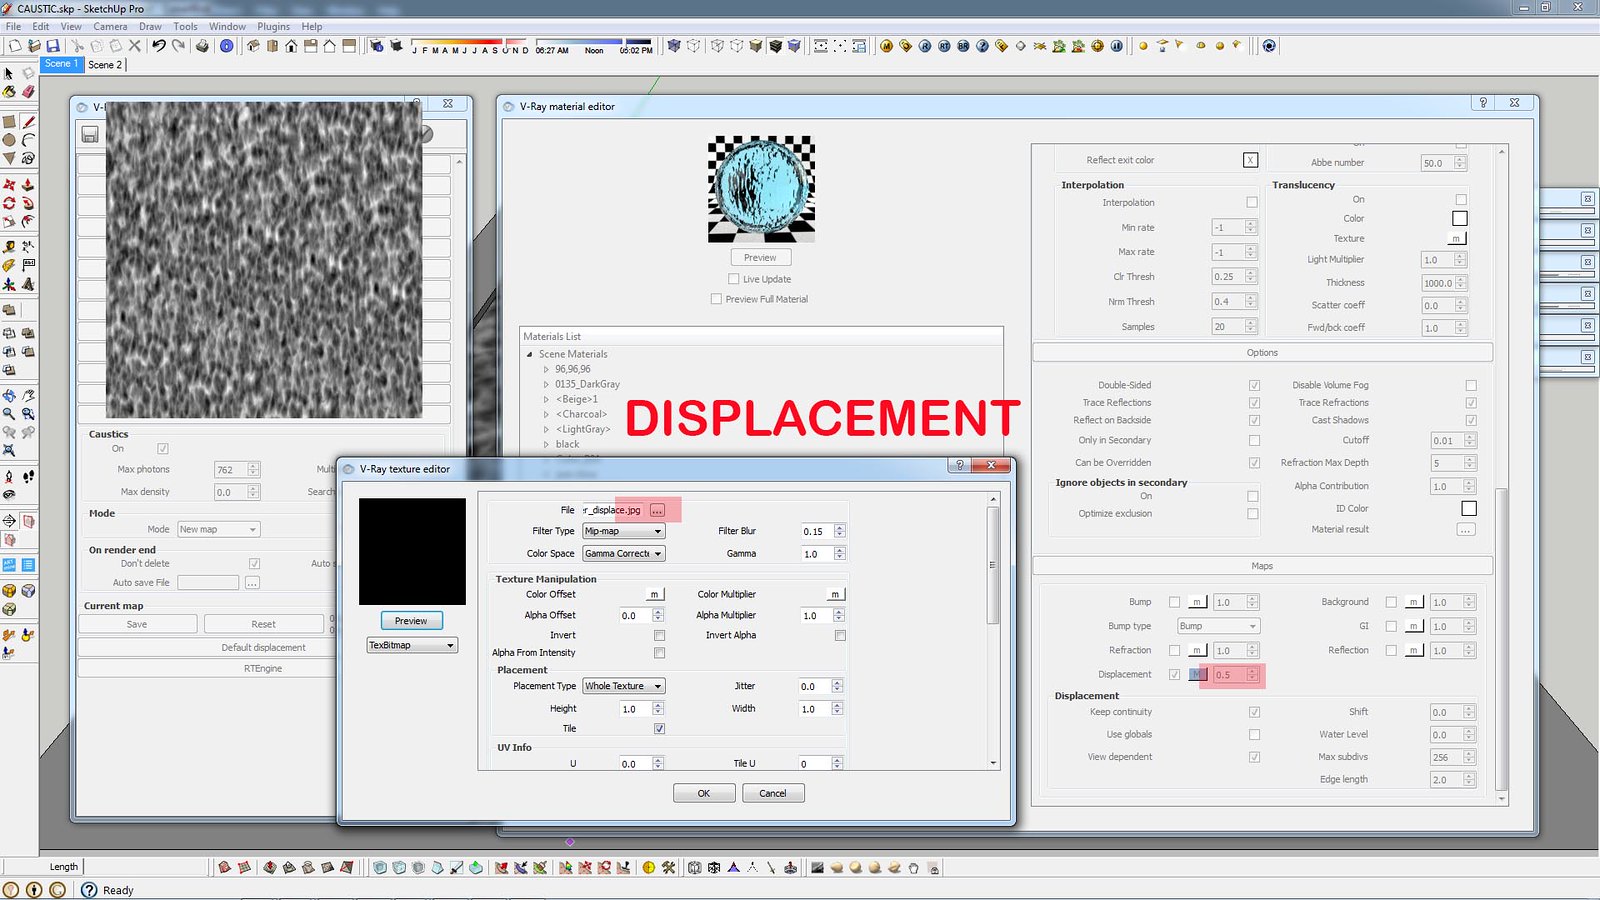
add displacement using same texture displacement with 0.5 value
many thanks and I hope you enjoy and keep on practicing. visoft and poolwater vismat
Monday, May 11, 2015
Wednesday, April 29, 2015


Subscribe to:
Posts (Atom)