s h o r t f o l i o . . .


https://farm6.staticflickr.com/5580/14769093690_4cb4c5afa8_o.jpg
                   
That's only my listed, work in progress and practice personal work, others are not to be published due to copyright ownership.

Friday, July 22, 2011

bathroom_wash area...materials

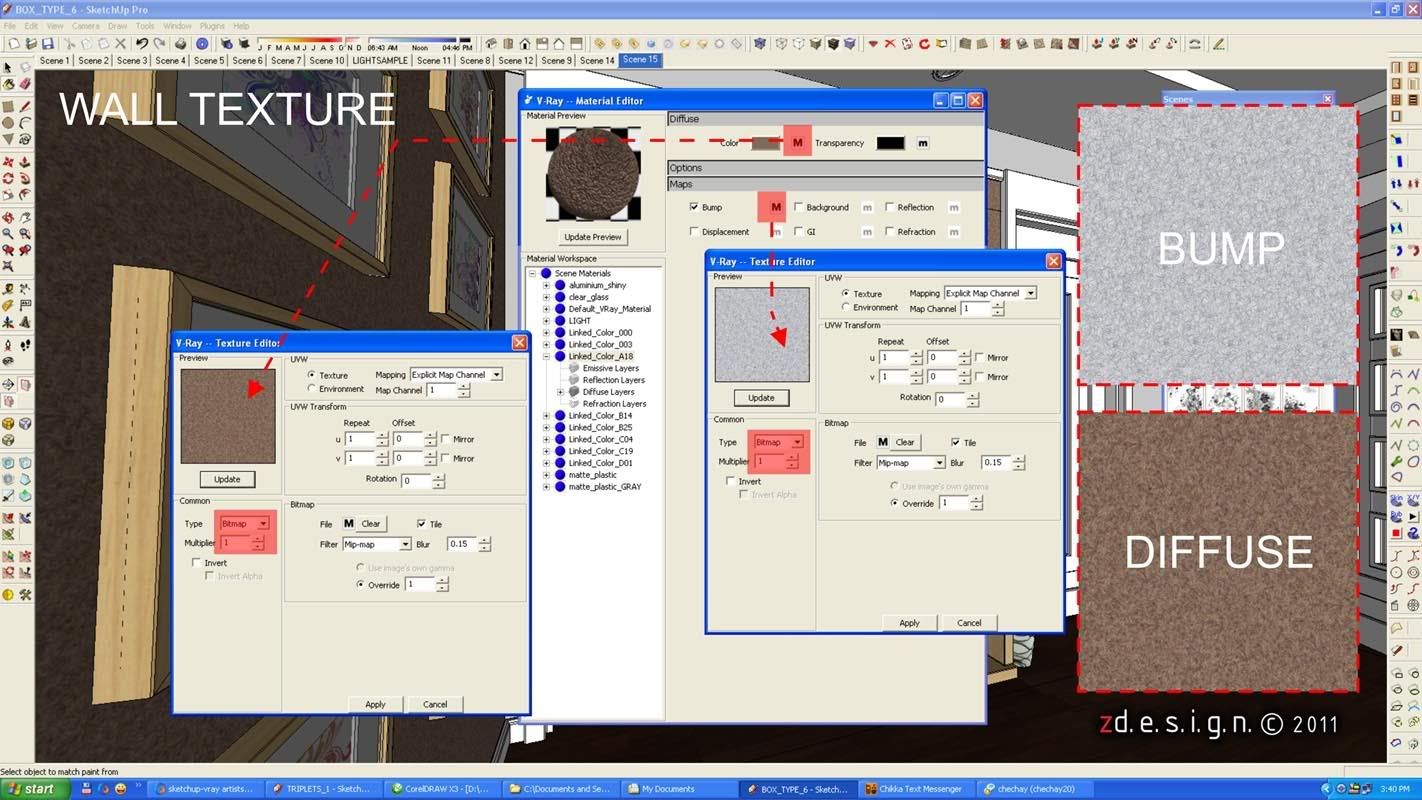
here's the material i used on this image...


Friday, July 15, 2011

Image featured in CatchUp – SketchUcation Community News – Edition 1


CatchUp – SketchUcation Community News – Edition 1
  • ShaderLight Interview with Kate Marshall
  • A Day at the Museum’ with Shane Fletcher
  • Character Modelling by Eric Lay
  • Axeonalias Interview
  • oStylus Hands On with Mike
  • FotoSketcher
  • Artisan Hands On
  • LayOut Tips and Tricks
  • Learn with Lemire 
pdf - February edition - 1
Visit -  www.sketchucation.com - the site with full of information.
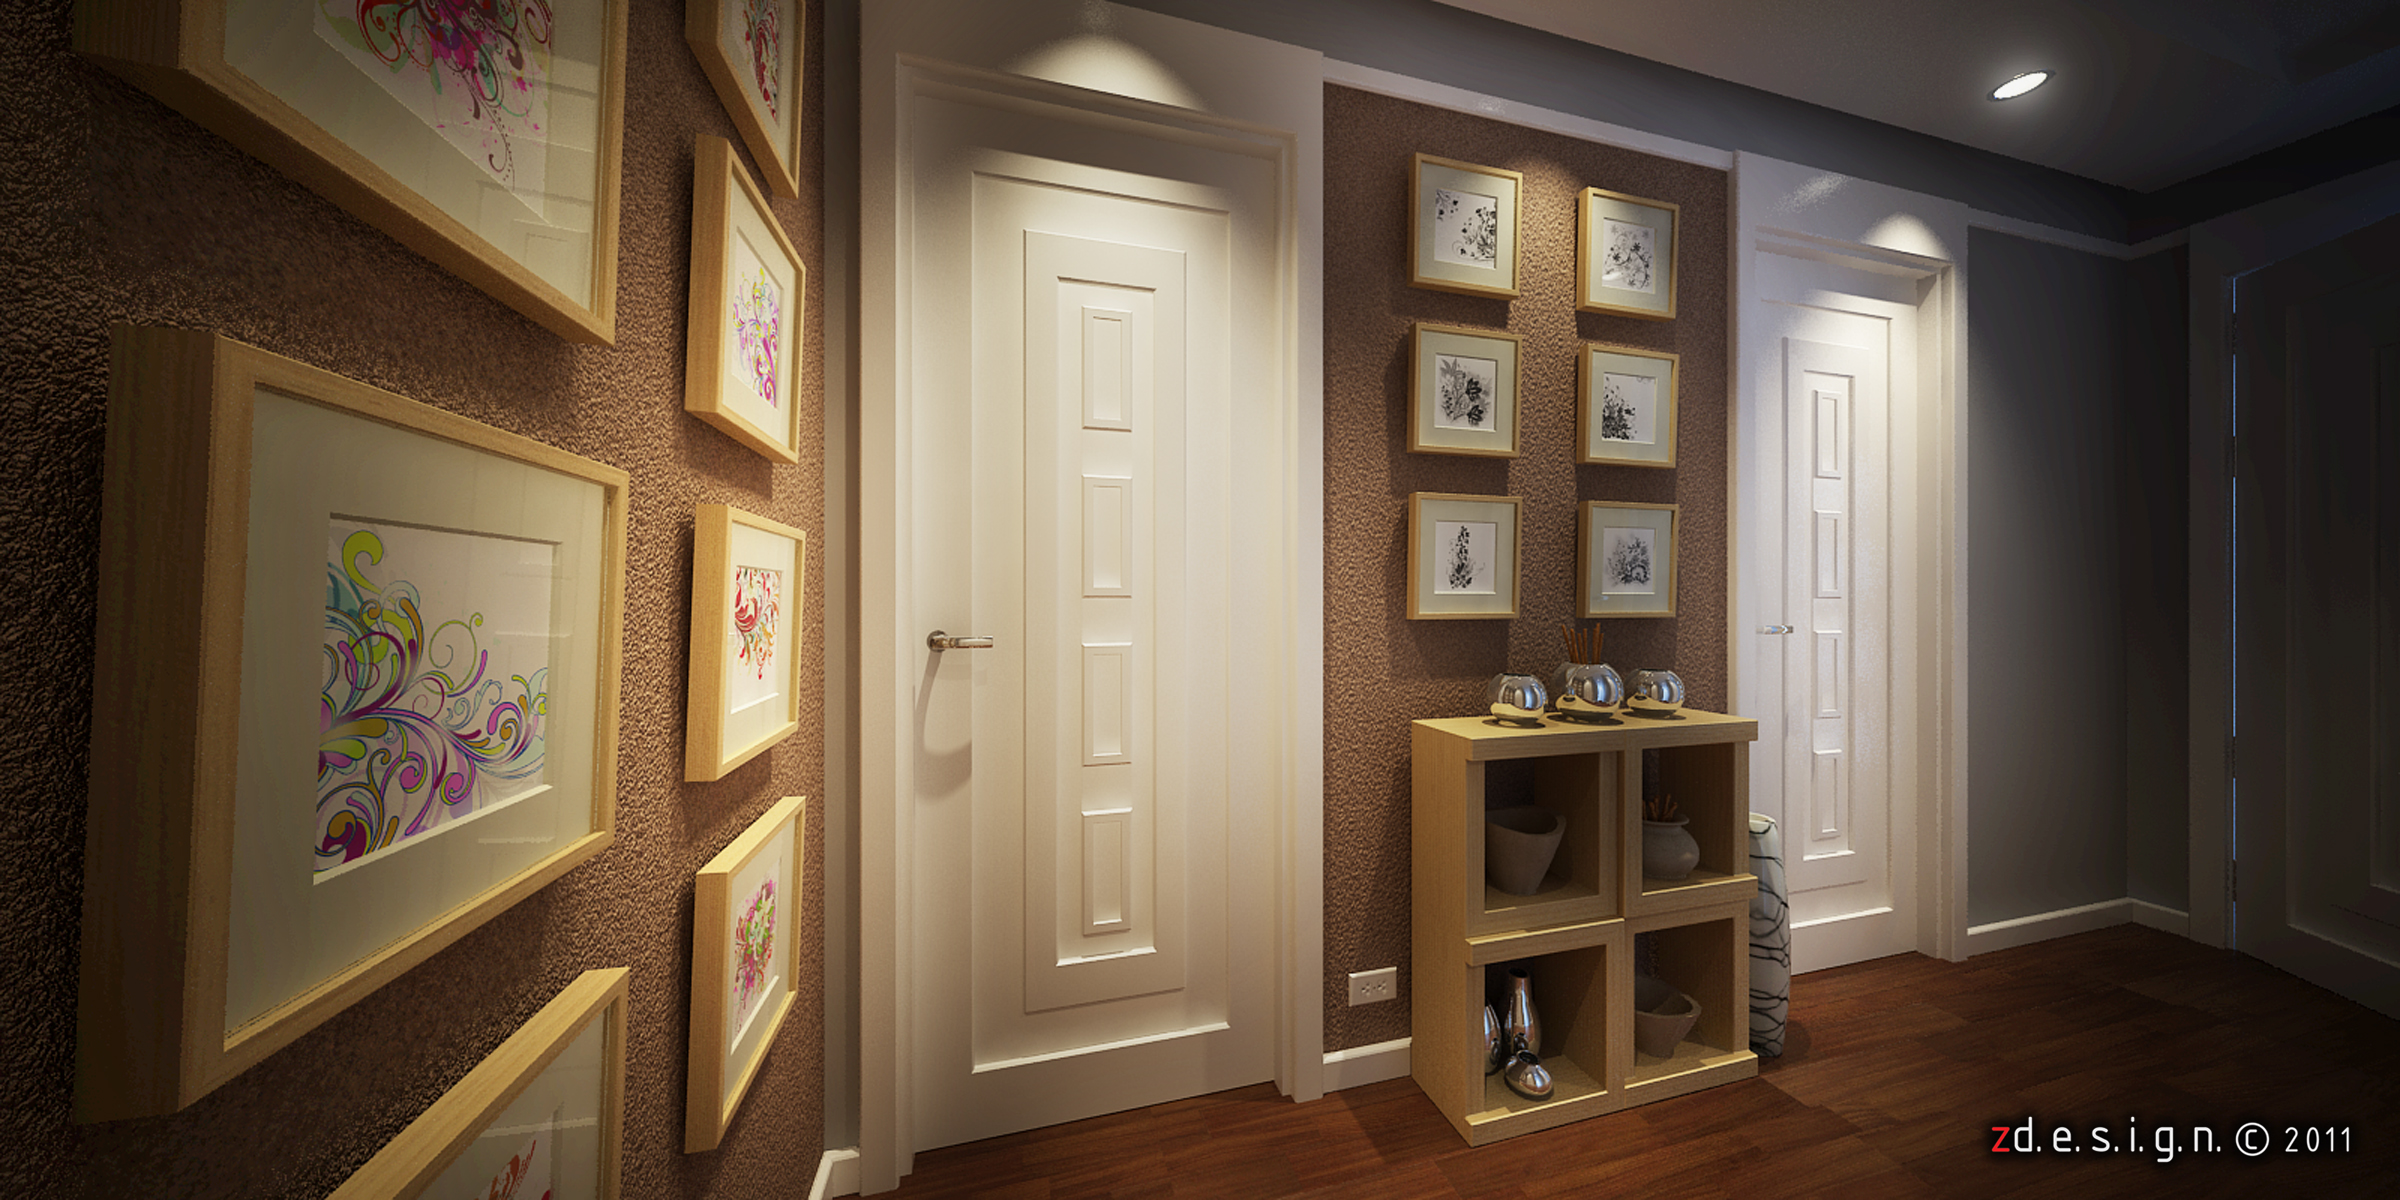
If you remember, this vray for sketchup rendered image is one of my entry in September 2010 Chaos Group Vray Render Contest and it's included in one of the pages of CatchUp – SketchUcation Community News – Edition 1

Thank you very much to sketchucation and the Daily Catchup

Vray Render Contest Entries - HERE

Check all the vrayrendered series and tutorial - HERE


One of the page in CatchUp – SketchUcation Community News – Edition 1


Monday, July 11, 2011

z_magazine cover...

 
 i plan to make a compilation of all my vrayrender images and tutorial to be posted soon...

Wednesday, July 6, 2011

Friday, July 1, 2011

Tips and Tricks on how to speed up rendering for 3d models

1.) as much as possible limit ur polycount to minimum.
     the more poly the slower the rendering.
2.) if ur using vray, always proxy the ones with high polycount.
3.) don't put too much subdivisions on your shadows (as much as possible).
4.) remove unwanted object on your scene
5.) dont use so giant/ultra/high texture if your rendering small output
     try to proportion both.
6.) material wise: avoid using too much glossiness and highlights, a simple
     diffuse, bump and reflection(with .95 - .75) will do.. try not to use
     archshaders..
7.) use high polys object only when the object is very near to the view or camera
8.) for exterior: standard directlight(as ur sun) and vray environment light is
     much more faster to render compared to vraysun and sky.. u just need to tweak
     the colors to achieved the sun&sky effect..
9.) know the difference between copy and instance.. simple but effective
10.) purge undo window, specially commands on the list that eat up memory..
11.) this i part of my resource management, i always shutoff my antivirus while
      rendering (or dont install at all), specially anti-virus like norton and mcafee
     (which sucks bigtime) this are memory hog application, same as old Nero
     updates, always check taskbar once a while, even screensaver and windows
     eyecandy specially in vista, i turn them off back to basic.
12.) use map efficiently, instead of modelling small details, in par with [#7.]
13.) use xref scene (but not sure duh, havent tried it yet)
14.) use polygon friendly 3dsmax plugins such as mootools' polycruncher, best of
     all its good tongue
15.) be wary of iteration levels when making curves/meshsmoothing
16.) when using irradiance map, check interpolation, par it with reflection and
      refraction interpolation on the submenu.. (match it with IR min/max rate with
      interpolation min/max rate)
17.) caustics are time killer
18.) first pass, brute force vs. irradiance map, (case to case basis)
19.) hardcore noisethreshold and AA subdivision rate, (case to case basis)
20.) be wary of glossy reflection and frosted materials..(case to case basis)
21.) instead of using dof in physical cam, Photoshop can do the trick with an ease
      with zbuffer channel or plugins like Alien Skin's DoF and DoF Generator PRO by
      Richard Rosenman.
22.) post process can short the rendering workflow, proffesional composition
     others like Autodesk's Combustion and the likes.. just know variations in
     renderchannels in vray render elements (F10).
23.) Evermotion Archshaders and Archinterior/Exterior Materials are on overkill
     settings, dont be lazy to edited it once a while, dont just copy and salvage
     someone's craft as it is.
24.) Irradiance and Light Cache (save to file), skip the computation when using the
     same sets and scene over and over again.
25.) balance with the resolution output and irradiance map settings.
26. before u place all the shaders. try to override first the materials in the
     rendering parameters(global switches.).to make sure all polygons are modelled
     correctly for test rendering so that you would knw the types of shaders u placed
     individually and u can trace easily which materials could possibly caused the
     rendering longer.
27).too many lights can also coz the overkill of the rendering.
28). use alwayz the default parameters for fast test renders..
29).For me i prefer ADAPTIVE QMC rather than Adaptive Subdivision...
30).Check your Raycast Parameters too..Like render region division,region sequence
     etc..
31)If ure using vray displacement mode,try to limit the area if 2d mapping ang
     setup for it eats a lot of ram.
32) Use 64bit Max
33) The use of X-refs is invaluable--primarily due to their ability to link large
     sections of scenery together and provide a means to keep your master scene to
     ballooning to an unwieldy size.
34) Attach those objects - 3ds Max is much more efficient working with 9000 10k
     polygon objects than 200,000 1k polygon objects. Attaching all the components
     that are not being individually animated adds a significant amount of speed and
     flexibility to the scene you're working on.
35) Geometry Proxies - Ah yes, my new favorite tool! A geometry proxy is an
     optimized piece of geometry that is designed to load and render much more
     efficiently in specific render engines such as Mental Ray & Vray.
36) Bitmap Proxies - Bitmap proxies are a great way to minimize the amount of RAM
     that you are expending on a scene.
37) Centralize your data - Centralizing your data adds a level of organization to
     any project.
38) Work Locally and Incremental Saves - Why you ask? Well, as you save to the
     network share, you can run into some traffic issues which can on occasion cause
     crashing and corrupted documents
39) Layers, Groups and Selection Sets - Any organized 3ds Max user has used these
     at one time or another, though some more than others.
40) Maxscripting - it can bring repetitive and laborious tasks to heal. This has
     saved me countless of production hours and has allowed us to tackle projects
     that would be impossible with the stock tools in 3ds Max.
41) learn Photoshop and other compositing softwares (AE, Combustion). you will save
     hell a lot of render times.
42) understand photography. train your eyes. its good to have a vision of what you
     want to achieve before you start with your rendering workflow. for example,
     you'll know when to cancel a render process (region render) rightaway soon as
     you spot something wrong on your buffer rather than waiting for the whole scene
     to finish then realizing something's wrong (so much time wasted already) and you
     have to re-render again. trained eyes helps to influence clients and manage them
     to understand your vision.
43. Bitmaps - these tend to take up large amounts of RAM, especially if the maps
     are large. Since textures are managed by 3dsmax, VRay has no direct control over
     their memory usage. However, you can use the Bitmap pager settings of 3dsmax to
     reduce the RAM taken up by bitmaps. Turn on and adjust the bitmap pagers into a
     higher amount, this will address your computer to process the memory in using
     bitmaps. This is especially useful in rendering large image.
44. You might want to check the multi-threading option if you are using a dual
     processor.
45. Use Low resolution for rendering tests.
46. Use Rendering Region: render only what interests you. Time to time check your
     shaders, verify the little differences.. and quickly find the result you’re
     looking for.
47. Do not add Glossy effects. Add it just when you think that the scene works fine.
48. Geometry - scenes with lots of objects and/or triangle counts require more
     memory to render. There are several ways to reduce this amount:
     -Adjust the raycaster settings in the System rollout (reduce Max. levels,
     increase Min. leaf size, increase Face/level coefficient, switch from Static to
     Dynamic Default Geometry).
49. Displacement mapping - objects displaced with the 2d displacement mapping
     method may require a lot of RAM to render, especially with large displacement
     maps. If this is the case, use the 3d displacement mapping method. Also, if you
     have several distinct displacement modifiers with the same displacement map, it
     is better to replace them with one modifier, applied to all the necessary
     objects. This is because each modifier will take RAM for the displacement map,
     separately from other modifiers, even if they have the same map.
50. Bitmap filtering - Summed area filtering uses much more memory than Pyramidal
     filtering. Use summed-area filtering only for smaller bitmaps
51. Shadow maps - these may also take up significant amounts of RAM. Again, these
     are managed by 3dsmax and VRay has no direct control over their memory usage. To
     reduce memory usage, you can switch to raytraced VRayShadows instead.
52. Image buffer - large output resolutions require a significant amount of RAM to
     store the final image. Additional G-Buffer channels increase that amount. There
     are several ways to reduce this amount:
    -Use the 3dsmax Bitmap pager, if you are rendering to the 3dsmax default VFB.
    -If you use VRay's own VFB, use the Render to VRay raw image file option and
     then use the VRay raw image file viewer to convert the resulting file to a
     different format.
53. Image samplers (AA) - the image sampling algorithms of VRay require some amount
     of RAM to hold all the data for the sampled image. This amount can be quite
     large, depending on the chosen bucket size and sampling rate. To reduce that
     amount:
    -Reduce the bucket size.
    -Switch to a different image sampler - for example, the Adaptive QMC sampler uses
     less RAM than the Adaptive subdivision sampler.
54. Global illumination caches - irradiance maps, photon maps and light maps all
     require additional memory to store them. Each of these has different methods for
     controlling its memory usage:
     -For the irradiance map - the memory depends on the number of samples in the map;
     you can reduce this number by using lower Min/Max rate, and more loose threshold
     values (higher Color threshold, higher Normal threshold, lower Distance
     threshold).
     -For the photon map - the memory depends on the number of photons stored. You can
     reduce this number by reducing the Diffuse subdivs for the lights, or by
     increasing the Max. density.
55. If not necessary, adjust your trace depth contols to a lower amount.
56. Even though you select the VRAY VFB as your output, the 3dmax VFB is stil
     created and thus taking additional memory. If you want to reduce that memory.
     you need to uncheck the "GET RESULOTION FROM MAX" option. Set the 3dmax
     resolution to lower value like 100 x 100, and then select your real output
     resolution in the VRAY VFB option
57. inspect your scene -was there are lots of unused polys, was there are lot of
     models that only clatters the scene but are not viewable on camera, was there
     are lots of unused materials on the editor....
     meaning, sometimes we think that our render setup is hampering the rendertime,
     but if we just inspect our scene, the things mention above are factors that
     affects.
58. another one. sometimes our model in autocad was located far from the axis
     origin, this happens most of the time. then once we link it up to our rendering
     program, we just let them as it is. This also prolong the rendertime when
     executed. Bring it back in 0,0 axis position while still in autocad.
59. Overlapping of Models and meshes. - a scene with much of these will take longer
     time to render. You need to tweak your setting into higher so as to cover up
     those splotches.
60. Rendering Large Image - rendering a large output image takes longer time when
     rendered as a whole. Use alternatives, like split rendering, or some render
     plugins like Super Render - wherein the scene will be subdivided into bucket
     window then automatically combining them after the last bucket.


    - world wide web