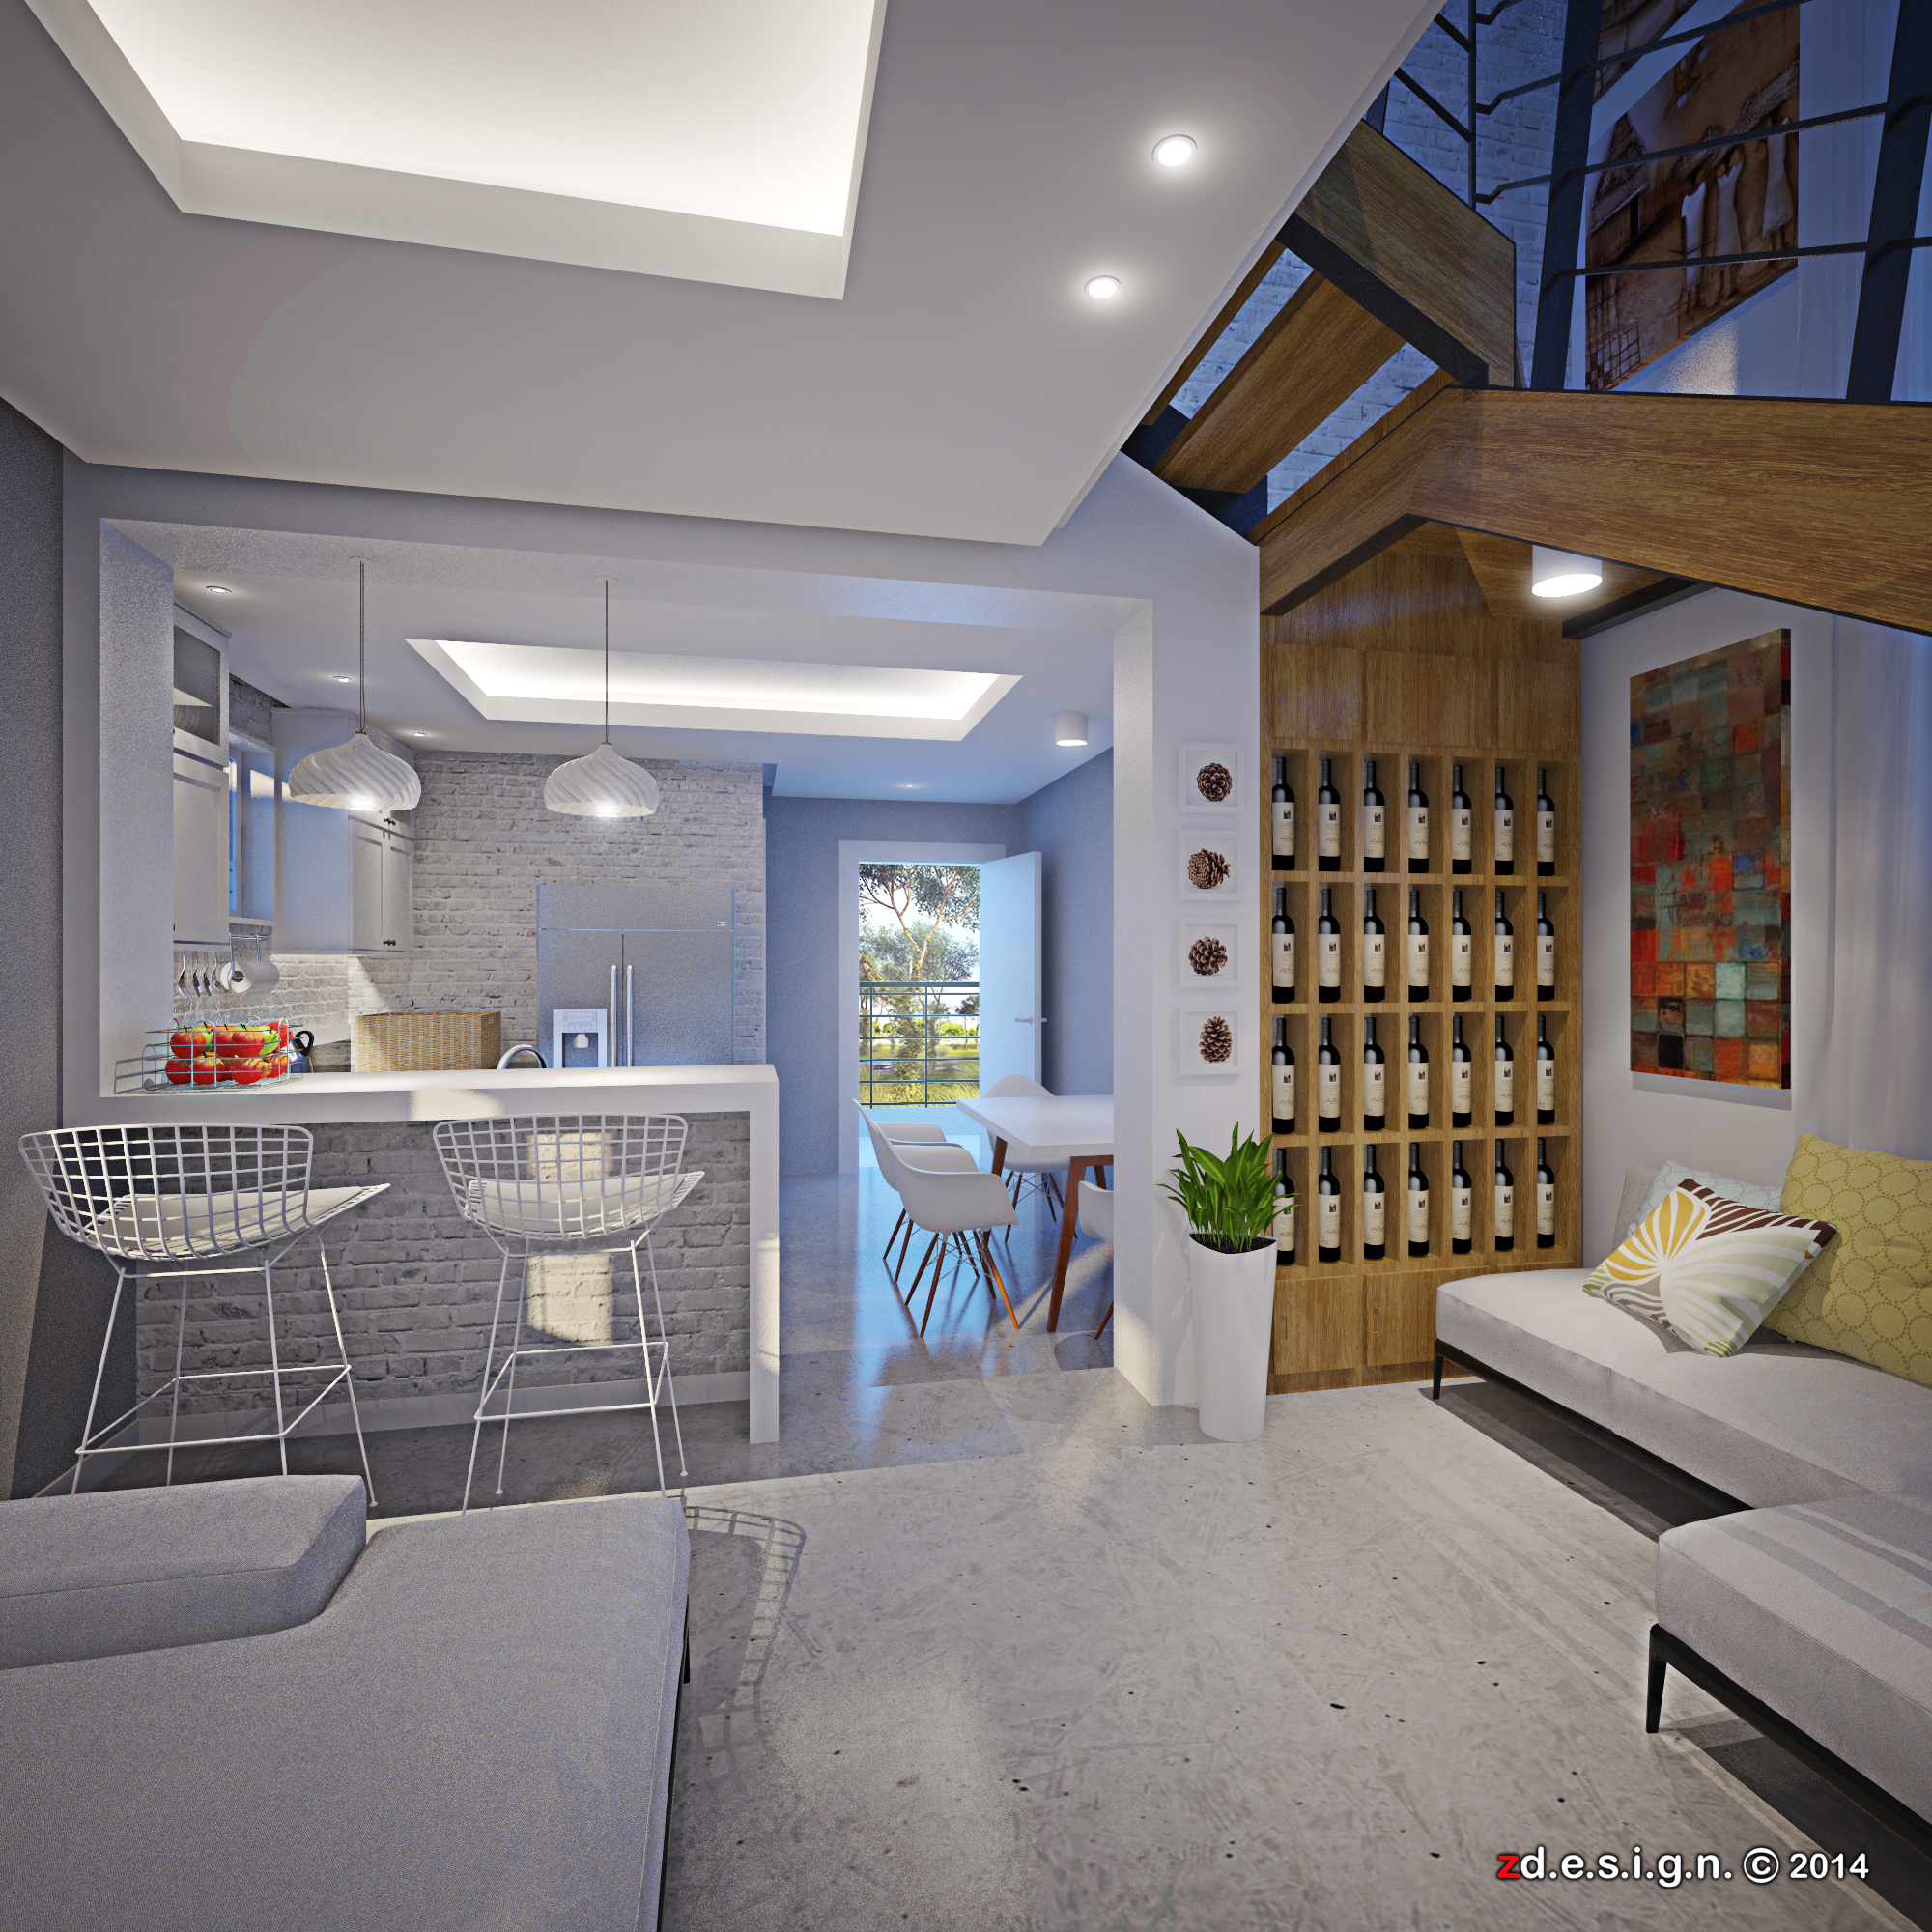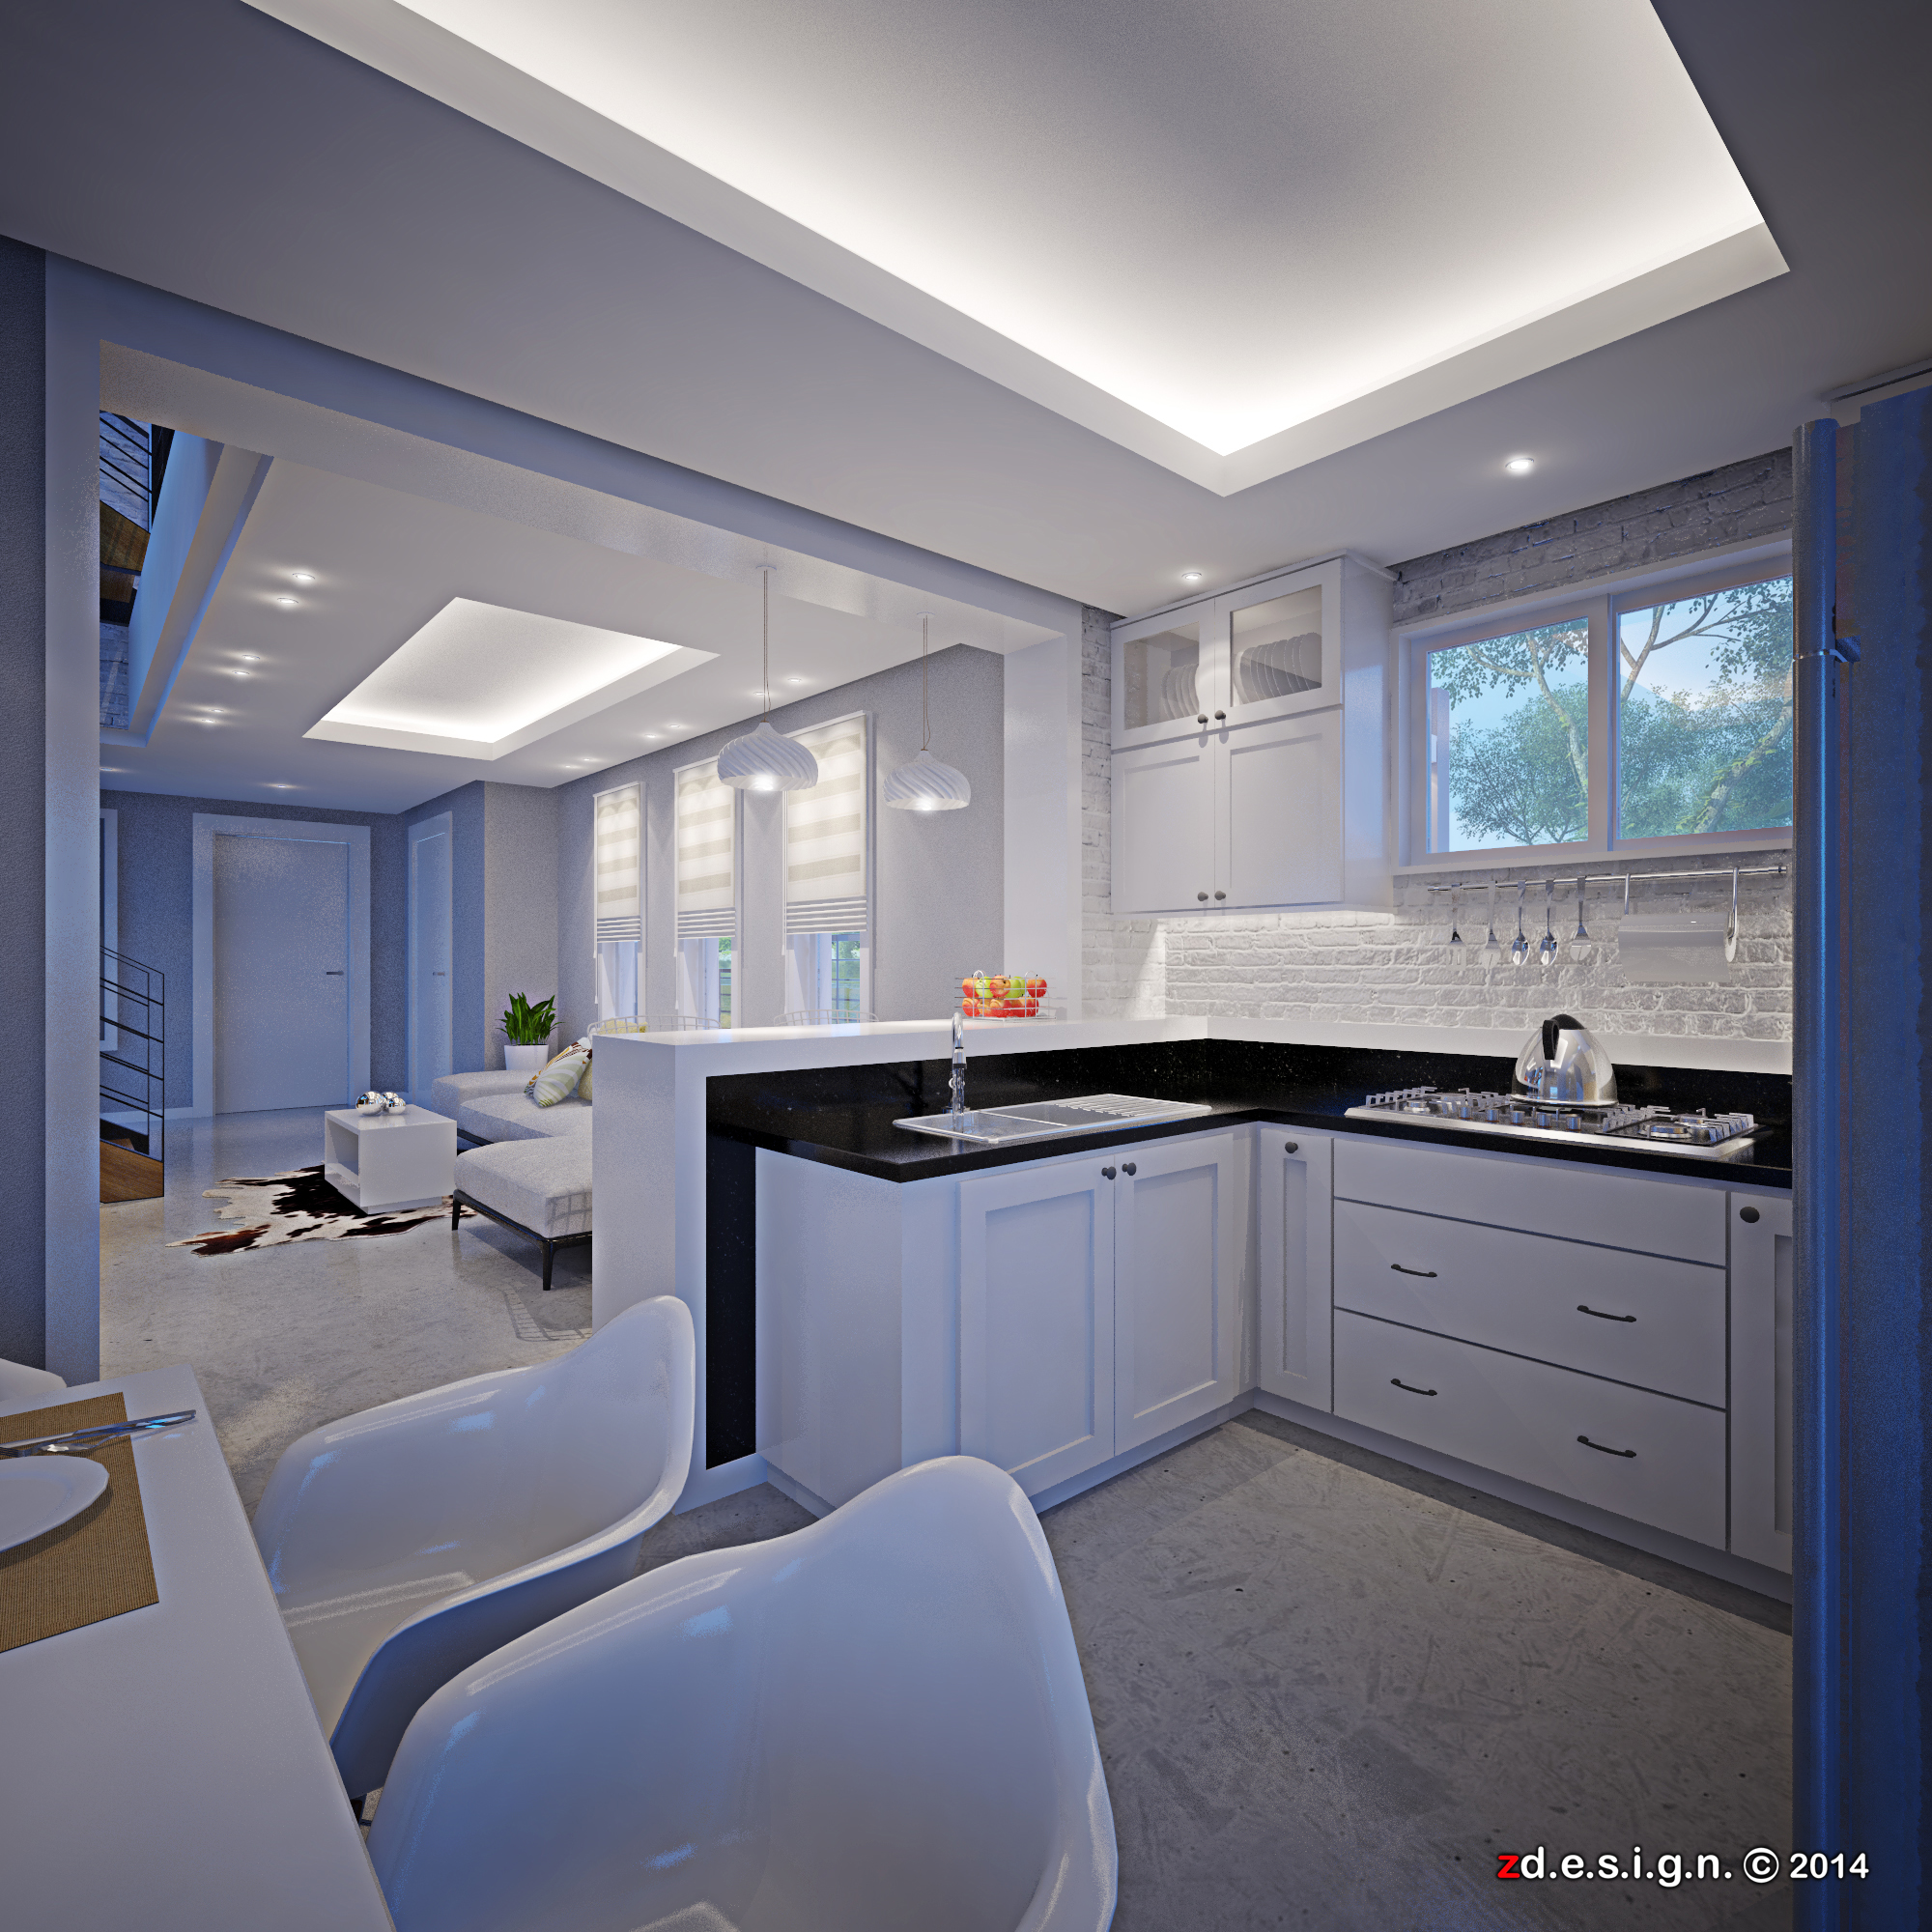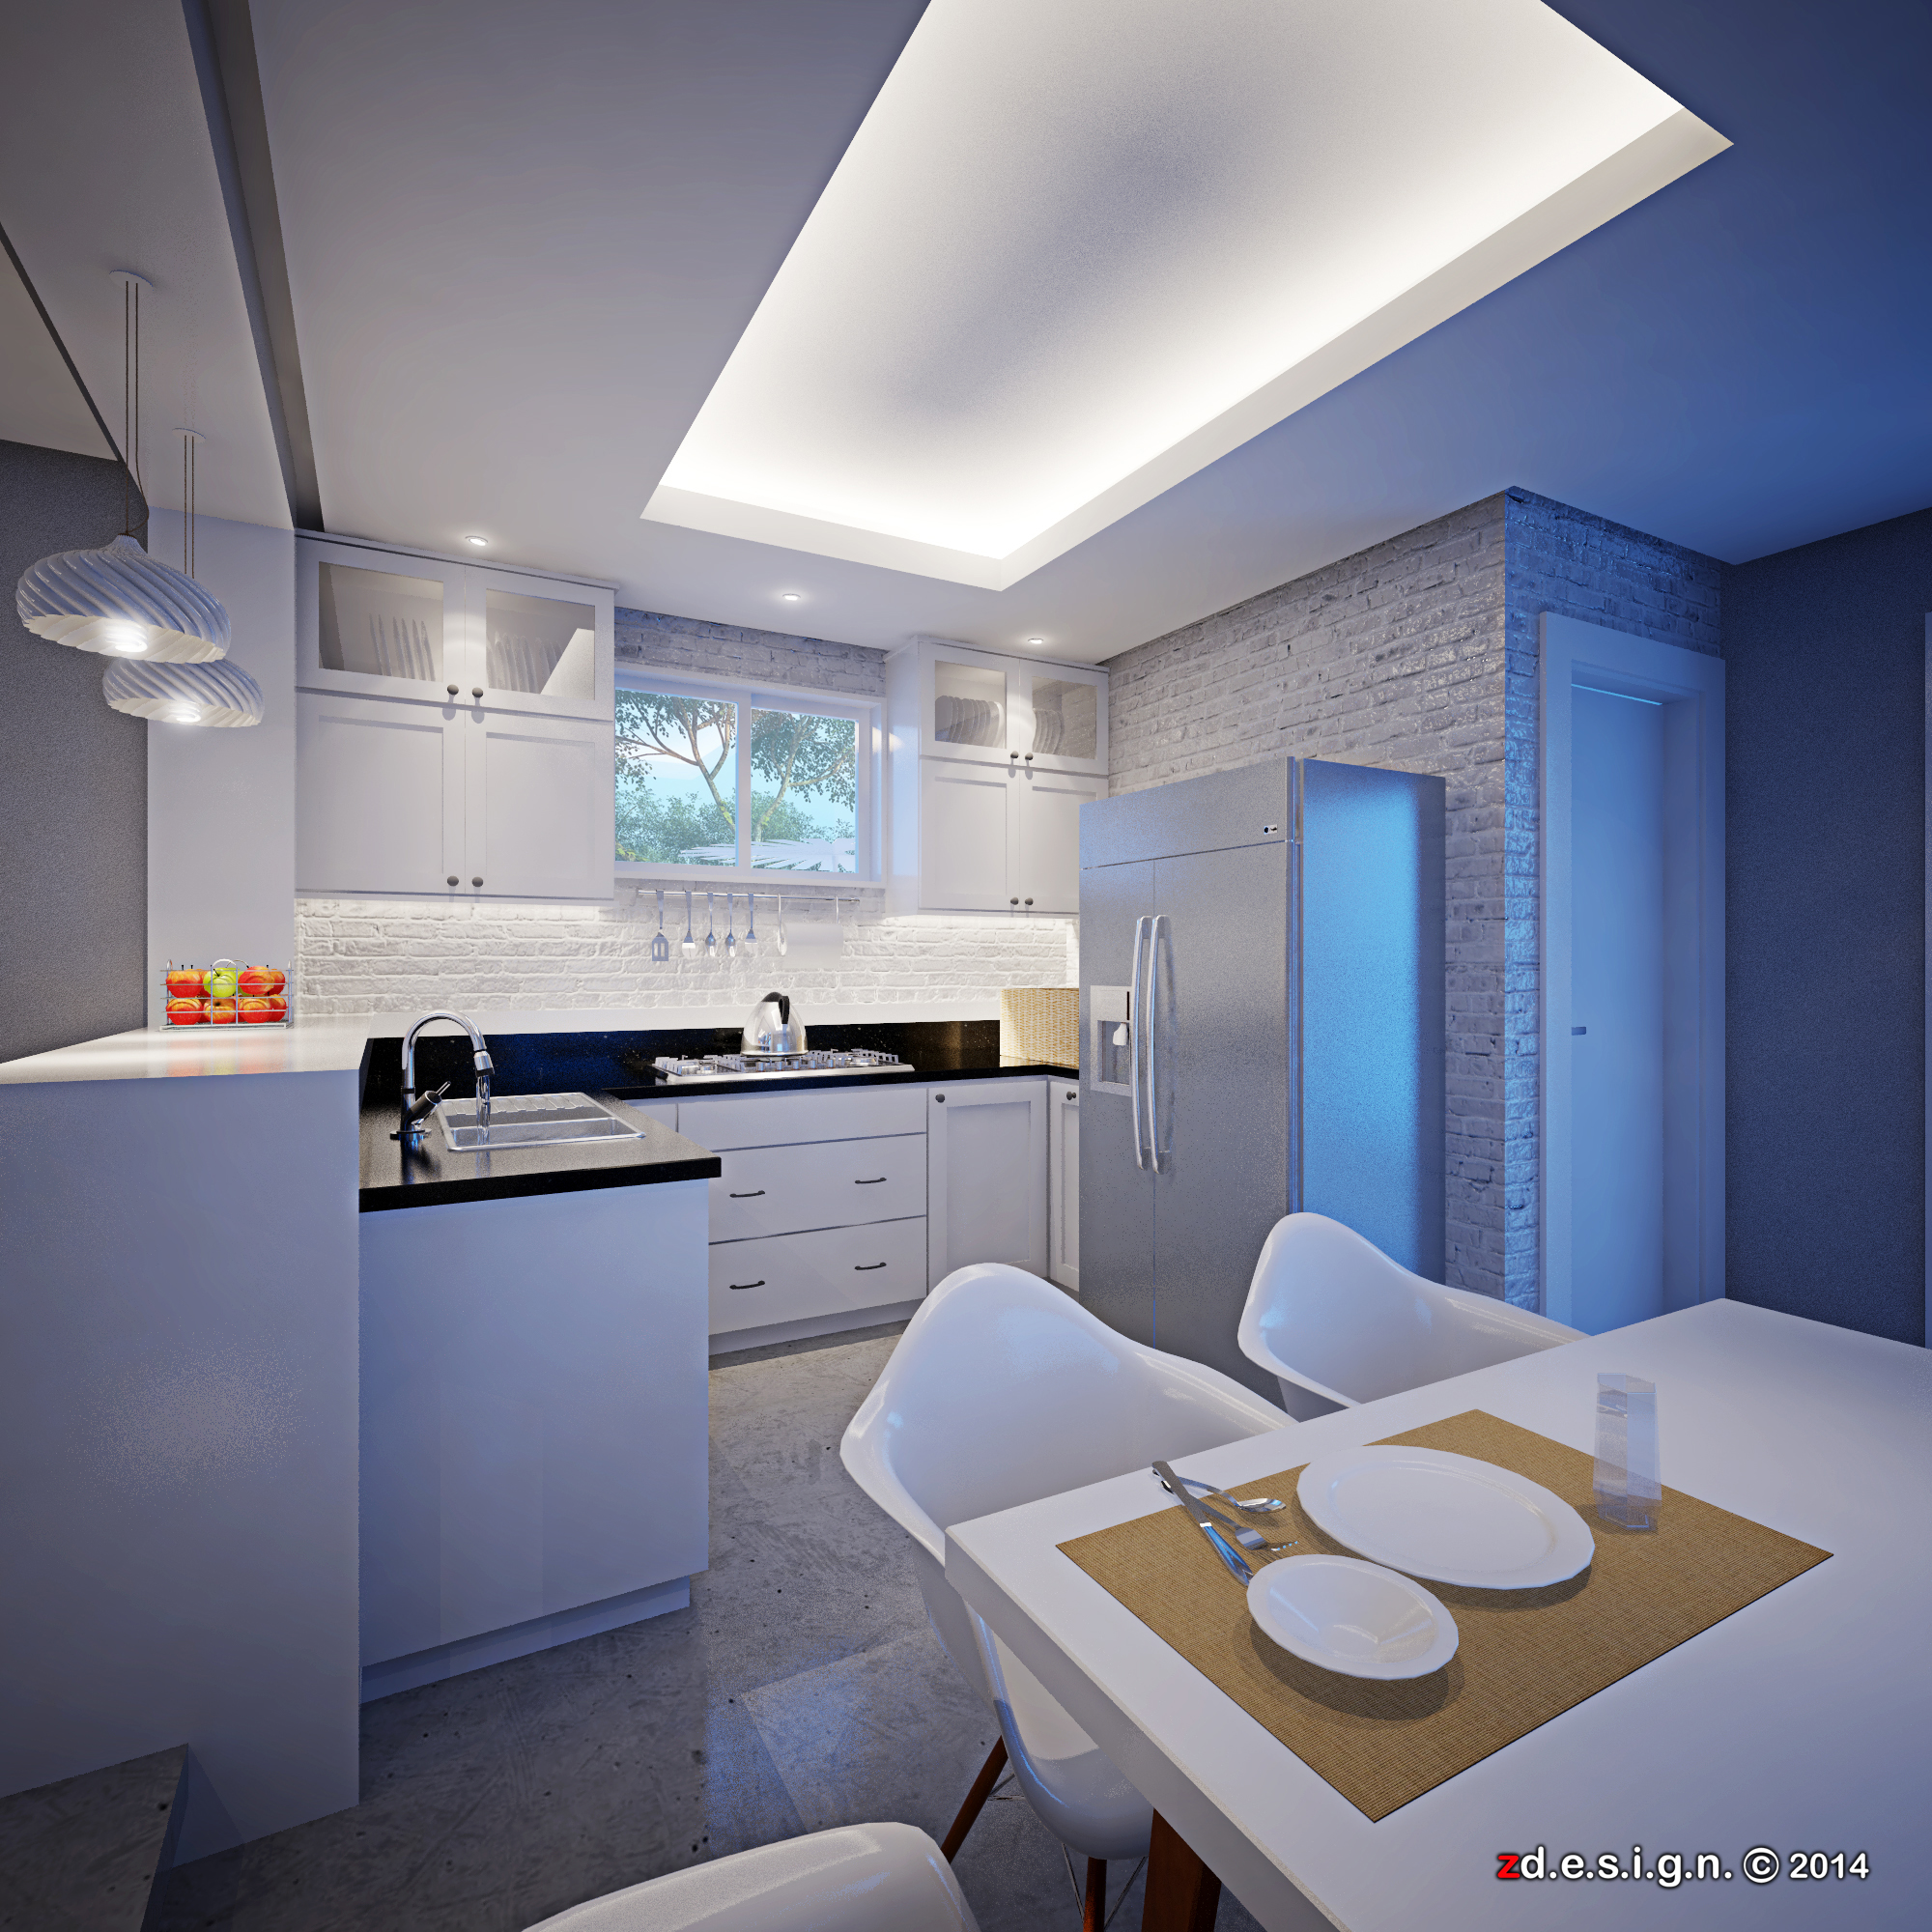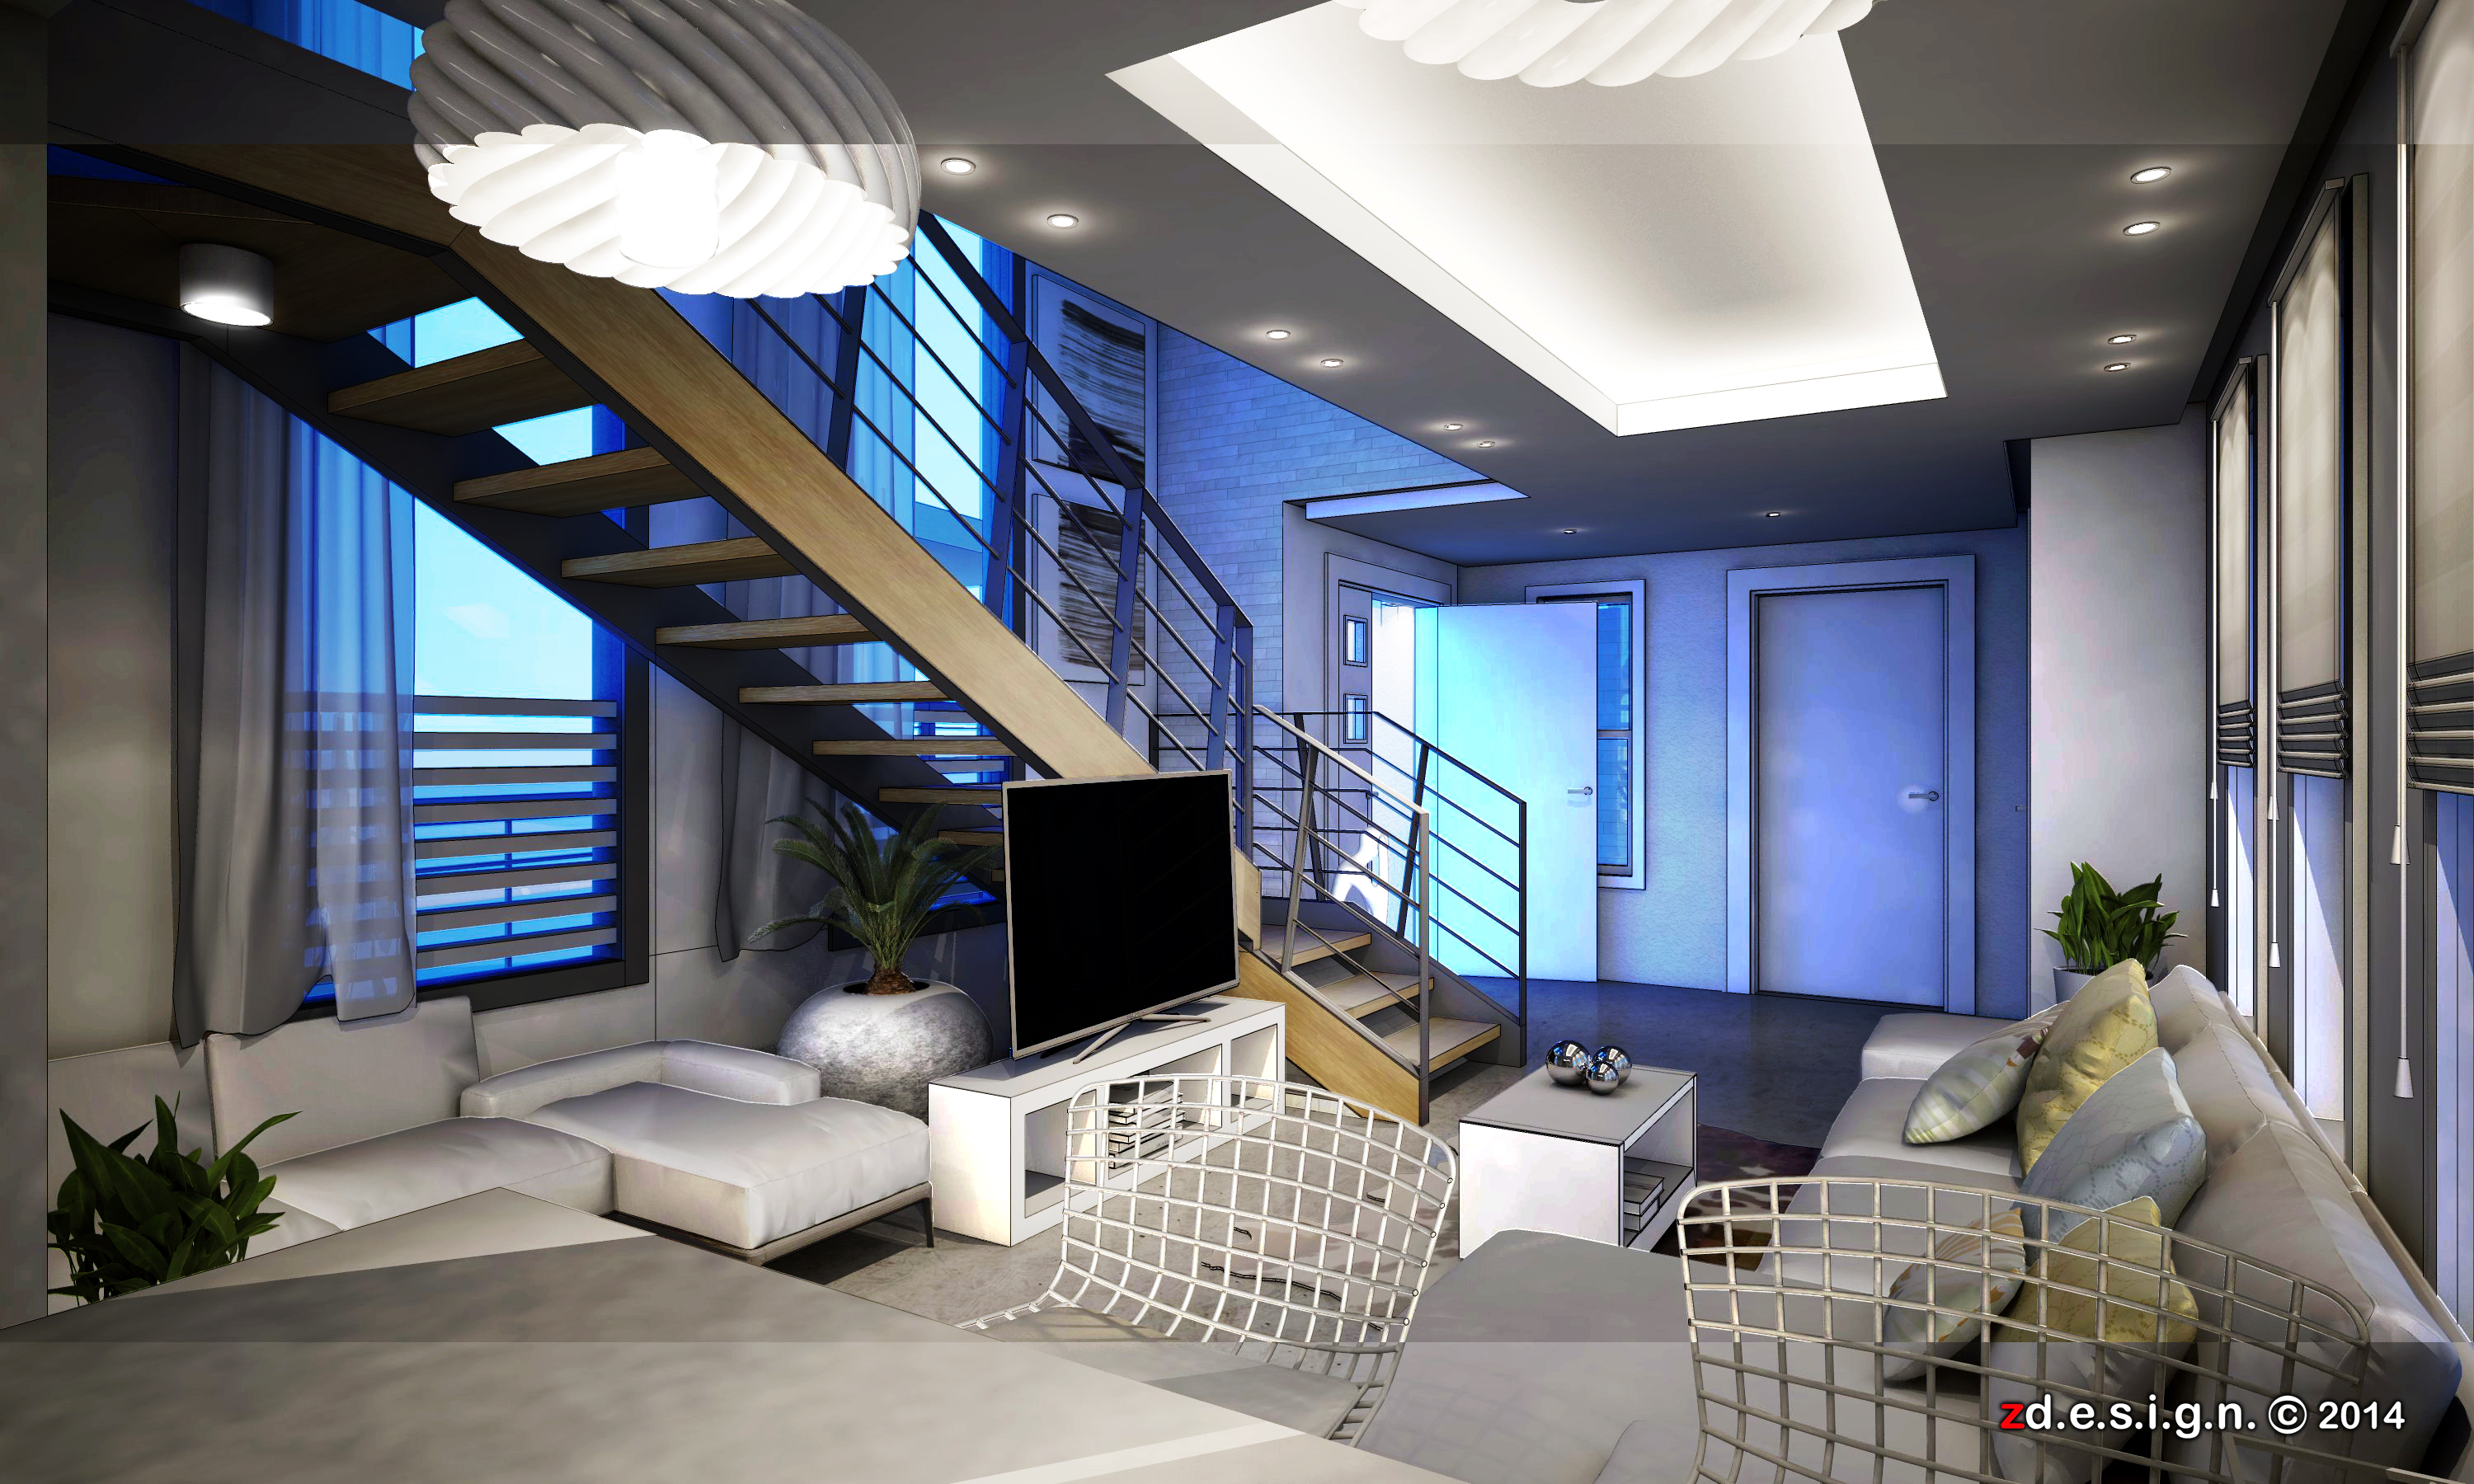

s h o r t f o l i o . . .


https://farm6.staticflickr.com/5580/14769093690_4cb4c5afa8_o.jpg
                   
That's only my listed, work in progress and practice personal work, others are not to be published due to copyright ownership.
Showing posts with label vray 2. Show all posts

Friday, October 16, 2026

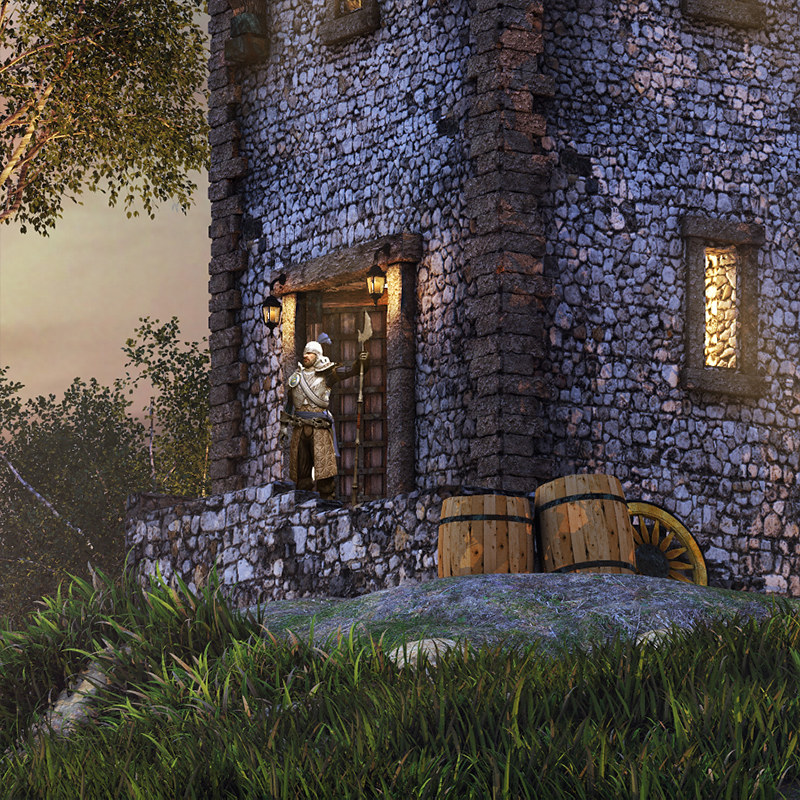
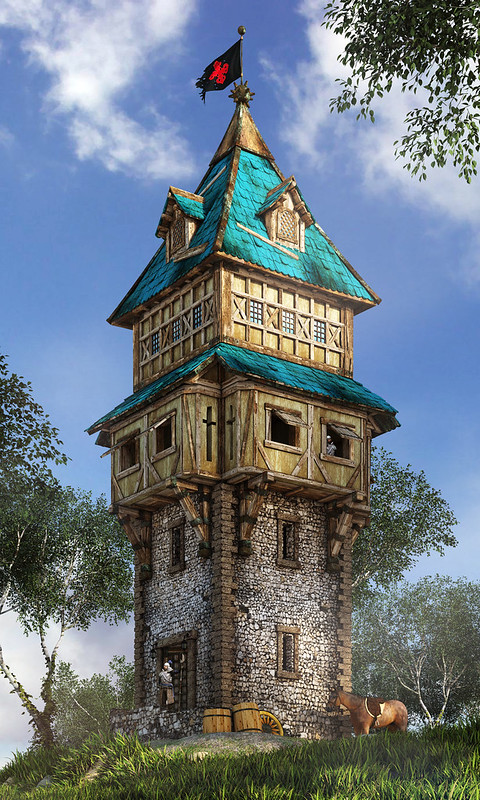
Guard Tower Diorama Process . . .

From Blueprint to Reality: Guard Tower Diorama Process 

Bringing a fantasy guard tower from a simple draft to a fully textured,
hand-painted physical masterpiece is a journey of digital precision and 
hands-on craftsmanship. #zdesignworks 


Here is a step-by-step breakdown of how this model came to life!

Step 1: AutoCAD 2D Drafting-Every great structure starts on paper or in vector space.
Detailed 2D architectural drawings drafted in AutoCAD, establishing key dimensions, floor elevations, window placements, 
and structural proportions. Pattern Planning-Individual components (shingles, timber frames, stone coursing, and roof pitch) 
were plotted out to serve as exact cutting templates for the physical build.

Step 2: SketchUp 3D Modeling-Visualizing Volume
Next, the 2D blueprint was brought into SketchUp to translate flat lines into a 3D digital model.   
Depth & Massing: Allowed to test architectural balance, overhangs, brackets, and roof angles in true perspective.
Lighting & Proportions: Visualizing the structure in 3D ensured that every timber beam, stone wall, 
and dormer window aligned seamlessly before cutting a single piece of material.

Step 3: Diorama Physical Mockup (Color-Coded Assembly) With templates ready, construction began using a sturdy 
mix of EVA Foam, thin Acrylic, SintraBoard, and Cardboard.
Structural Core: Rigid SintraBoard and Cardboard formed the internal base framing and main tower walls for durability and strength.
Textural Layering: EVA Foam was cut, carved, and layered to form individual bricks, stone blocks, and roof shingles.
Color-Coded Blocking: High-contrast foam colors (reds, blues, yellows, black) were utilized during the test fit to easily distinguish different material zones 
(stone base, timber frame, roof tiles, trims) and verify proportions before priming.

Step 4: Texturing, Painting & Scenic Finishing (Bringing It To Life) The final stage transforms raw foam and plastic 
into realistic stone, wood, and metal.
Surface Texturing: Heat-treating, wire-brushing, and tin-foil rolling gave the EVA foam authentic weathered stone textures and aged wood grain.
Base Coating & Washes: 
Dark primer followed by heavy dark washes sunk into every crevice, highlighting depth and shadow.
Dry Brushing & Details: 
Layered dry brushing brought out realistic stone highlights and aged wood tones, while a vibrant weathered teal blue 
gave the roof shingles an antique ceramic/slate feel.
Base & Terrain: The base was dressed with static grass, realistic rocks, barrels, and glowing magical accents to set the scene.
Materials Used: EVA Foam | SintraBoard | Cardboard | Acrylic Elements | Static Grass & Terrain scenics    


Tuesday, November 3, 2015

WOOD PARQUET FLOORING . . . VISMAT

Using Displacement | Normal | Specular maps 

Trial -   adding specular map to perpendicular slot of the Fresnel and normal map to the Reflection Glossiness slot.


Monday, August 17, 2015

Epic - STONE BRIDGE . . .( the making )

A structure that spans and provides a passage over a road, railway, river, or some other obstacle
There is no complete communication system without a bridge. Laying foundations for this beautiful arched bridge where the river flows all year round was not an easy task, but the town's masons managed to built it proving them selves to be skillful engineers.
https://c2.staticflickr.com/6/5676/20459505450_33cc593f88_h.jpg
https://c1.staticflickr.com/1/595/21181830335_5a0fb0ed4f_h.jpg
https://c1.staticflickr.com/1/626/20993903298_1e99c0375a_h.jpg

check WIP - HERE

Thursday, August 6, 2015

Epic - GUARD TOWER . . .( final )

In dark medieval times, every city had to defend itself. Buildings like Guard Tower enable soldiers to spot the enemy on time in order to make all necessary actions to properly prepare the city for attack . . .  check WIP - HERE & HERE
https://c1.staticflickr.com/1/304/20129561700_262f1bd1f8_h.jpg
https://c1.staticflickr.com/1/318/20130964639_0aea94ec31_h.jpg
https://c1.staticflickr.com/1/301/20129569338_64b0456a58_h.jpg
check here my reference BACKGROUND
https://c1.staticflickr.com/1/559/20231100790_6b0477b81a_c.jpg
https://c1.staticflickr.com/1/307/20419136835_0235191575_c.jpg https://c1.staticflickr.com/1/360/20392918896_7f7a816576_c.jpg
https://c1.staticflickr.com/1/300/20410521872_837935fbf9_c.jpg https://c1.staticflickr.com/1/311/19796503514_faf1e6b112_c.jpg
https://c2.staticflickr.com/6/5809/20347719608_bdc8b31dec_c.jpg 
https://c2.staticflickr.com/6/5728/20509508546_475c7bf541_c.jpg https://c2.staticflickr.com/6/5792/19914838783_c459ac3afd_c.jpg
https://c2.staticflickr.com/6/5820/20526854442_d0a0501019_c.jpg https://c2.staticflickr.com/6/5693/20535749125_822086147e_c.jpg
https://c2.staticflickr.com/6/5682/19915551264_0cdca01426_c.jpg

Wednesday, July 29, 2015

Epic - GUARD TOWER . . .( the making )

In dark medieval times, every city had to defend itself. Buildings like Guard Tower enable soldiers to spot the enemy on time in order to make all necessary actions to properly prepare the city for attack. When the soldiers on the Guard Tower sound the alarm, town gates are being sealed and all who can fight equip themselves with weapons and readily await the battle to commence. Guard towers are built on the outskirts of a city, preferably on higher ground. These buildings have to be sturdy enough to withstand enemy’s cannon balls, stones thrown by catapults or even attacks by frenzied monsters such as Giants and Treeman. It has to be high enough so soldiers are able to see as much landscape as possible. Sometimes whole regiments of archers and other troops are stationed in one Guard Tower.
https://c1.staticflickr.com/1/318/19493647083_d7aec35db9_n.jpg
https://c1.staticflickr.com/1/268/19486495363_0567f71e24_h.jpg
check WIP - HERE

https://c1.staticflickr.com/1/310/20108218835_ab3515d1c4_h.jpg
https://c2.staticflickr.com/4/3831/19927369149_55b50d97db_h.jpg
https://c1.staticflickr.com/1/314/19493071033_a5101e9e40_h.jpg
https://c1.staticflickr.com/1/354/20143399551_a2fe770bec_c.jpg
https://c1.staticflickr.com/1/309/20129912832_7a08485c8c_c.jpg
https://c1.staticflickr.com/1/441/20148562481_5f64d4b275_c.jpg
check final SCENE
REFERENCE

Thursday, May 28, 2015

CAUSTIC WATER . . . Tutorial with Tips and trick :)

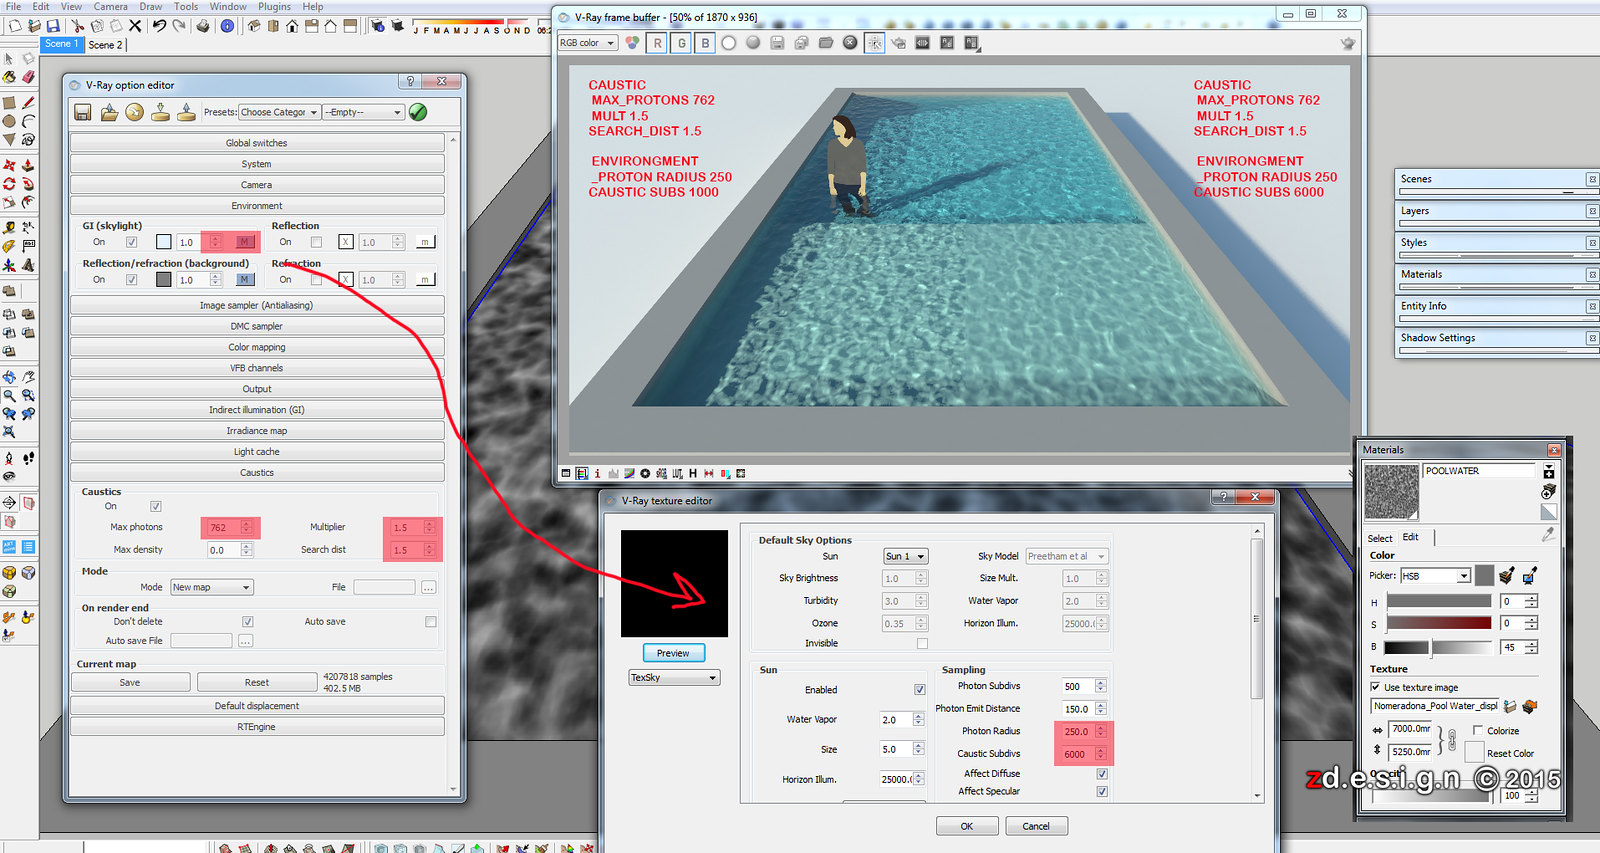
Here's my caustic version using mm. in sketchup since inches is the default unit. I use nomeradona's displacement texture here - many thanks sir nomer

From Default setting open vray option editor, adjust GI photon radius from 50 to 250 and caustic subs 1000 to 6000 open caustics change Max photons from 30 to 762, Multiplier from 1 to 1.5, and search dist from 20 down to 1.5 and I set my texture size in material editor 7000w x 5250h in mm. for more realistic caustic projection.

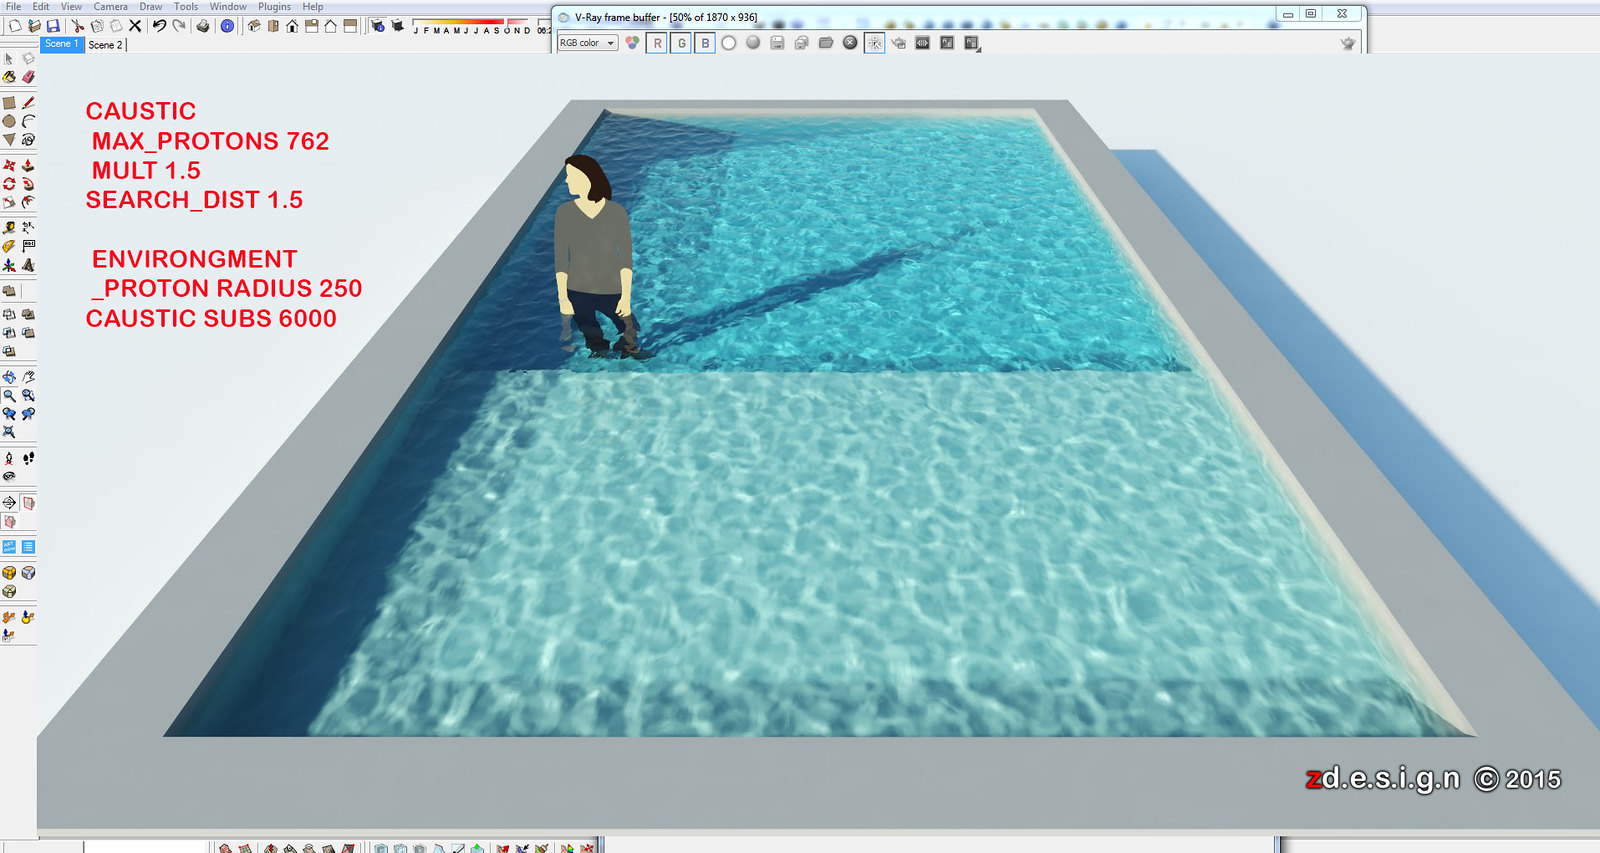
here's my sample image render using two different caustic subs
sample image render using 4 different search distance 
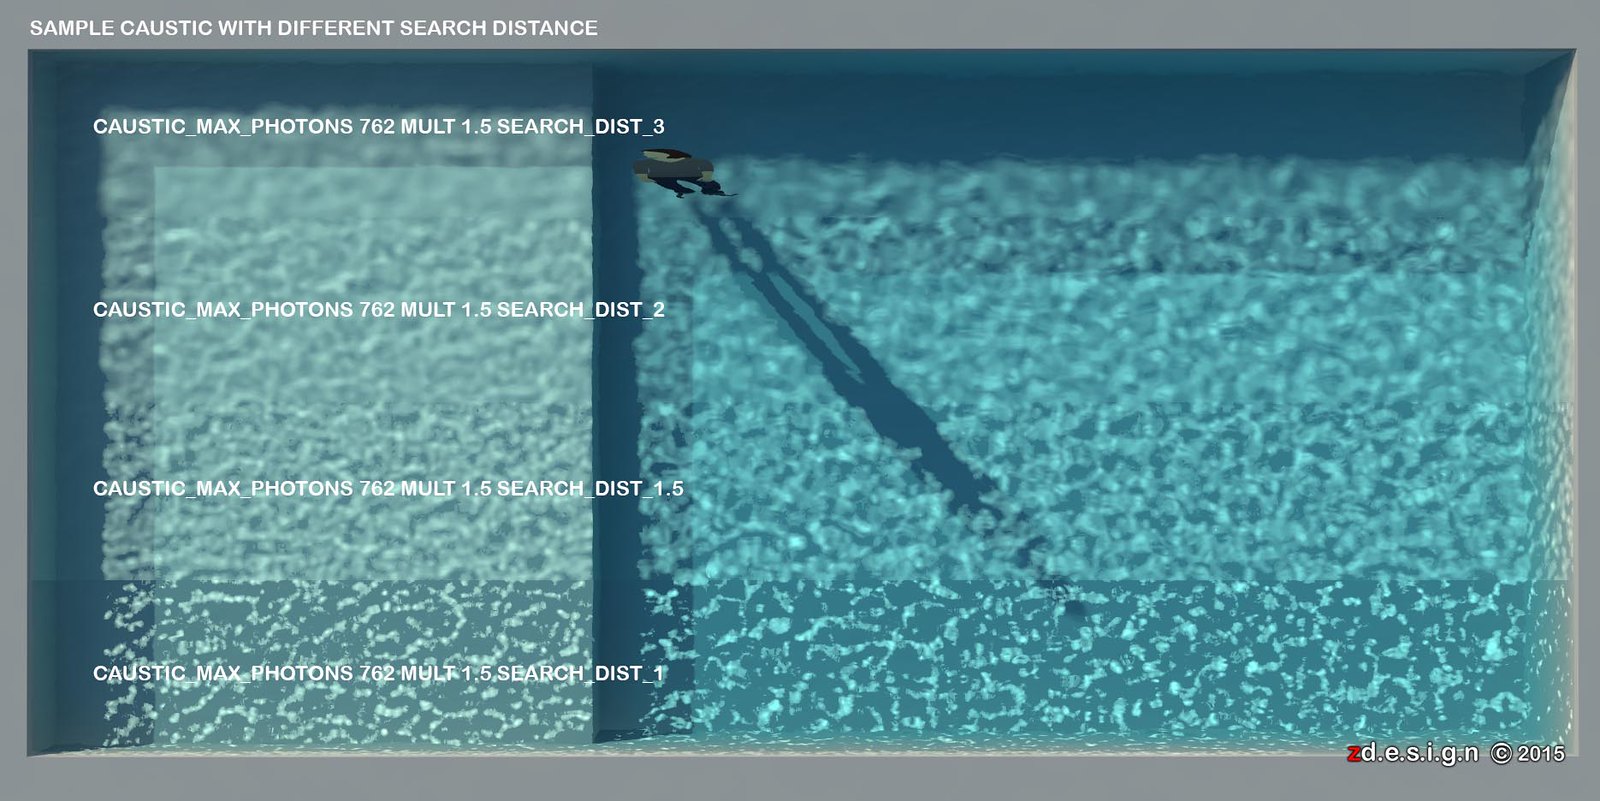
sample image render with good caustic setting (please correct me if i am wrong)
 
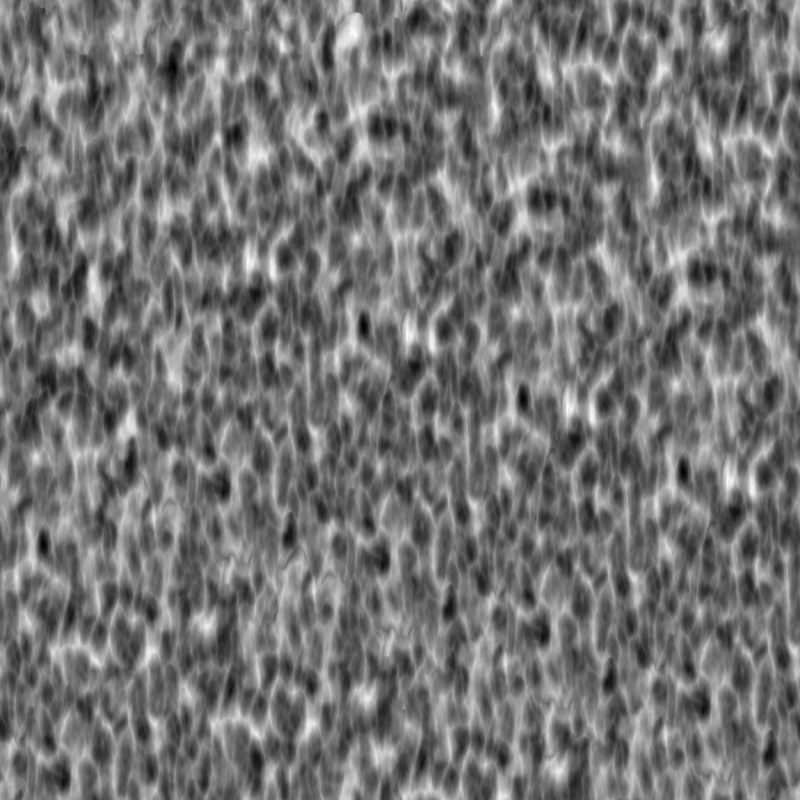
sample image displacement by nomeradona here
 
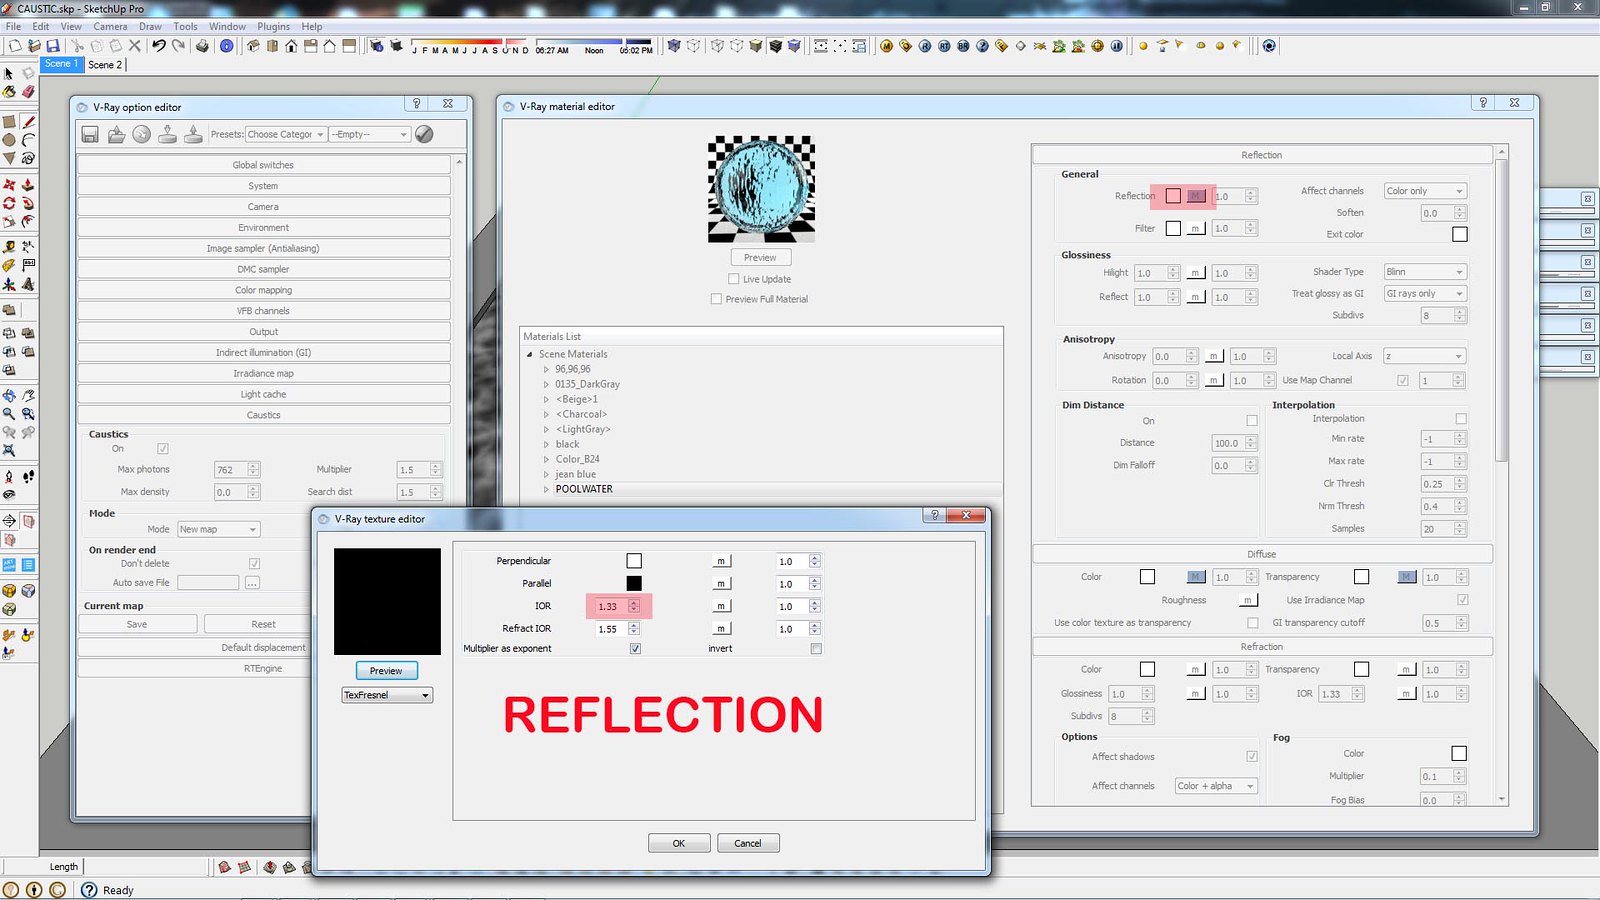
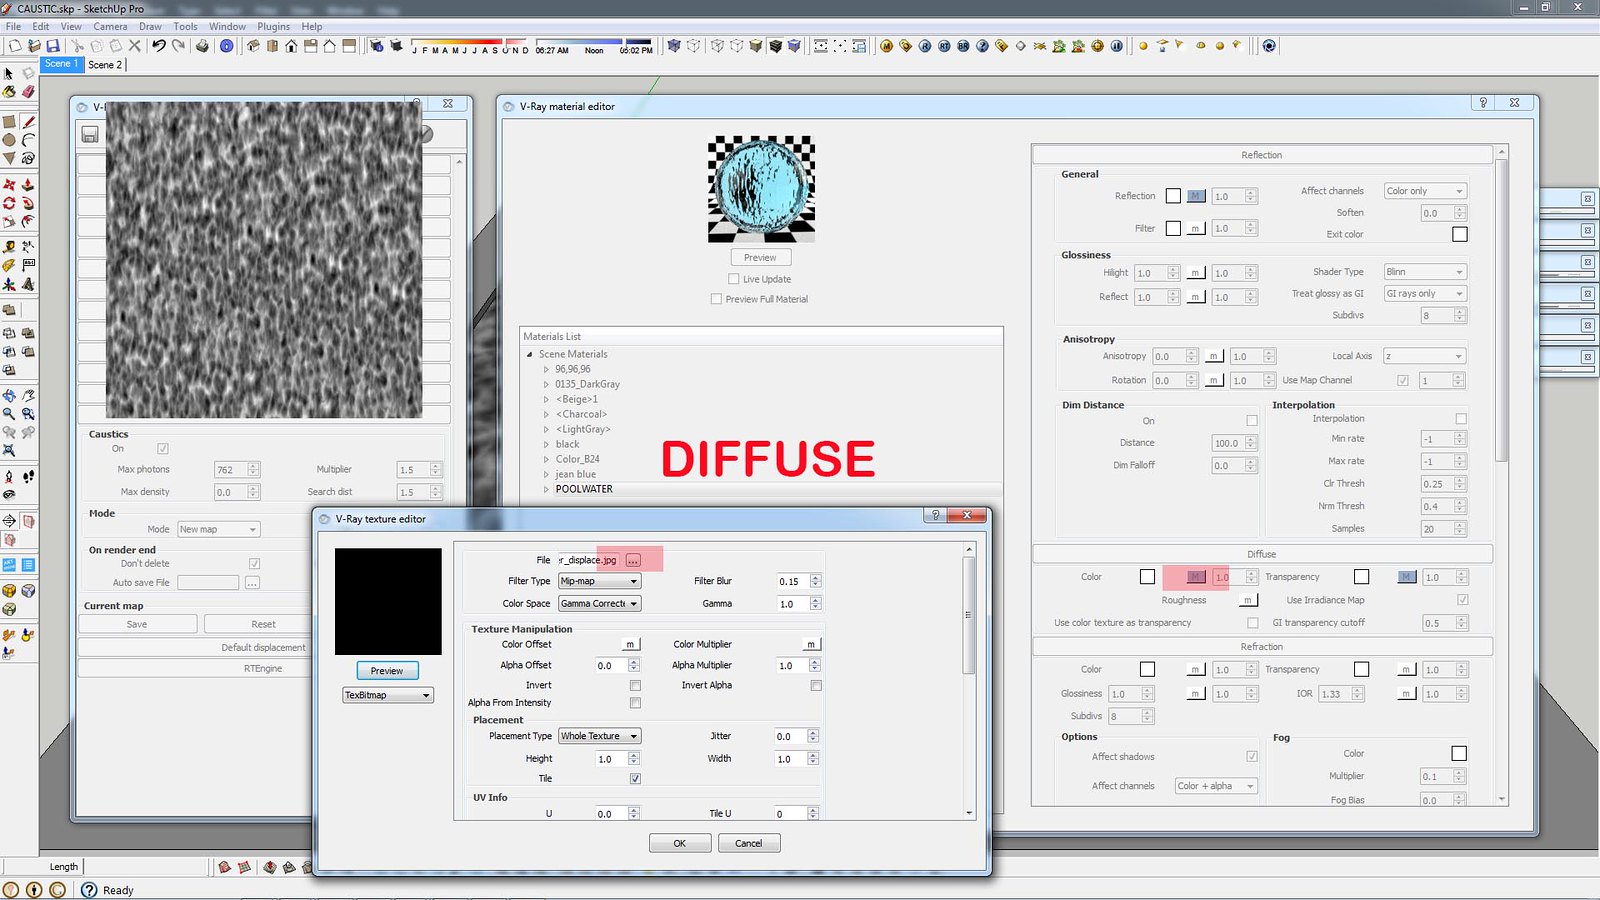
here's the trick using that same displacement - add reflection and set IOR 1.33
in diffuse layer M attached the displacement material by nomeradona
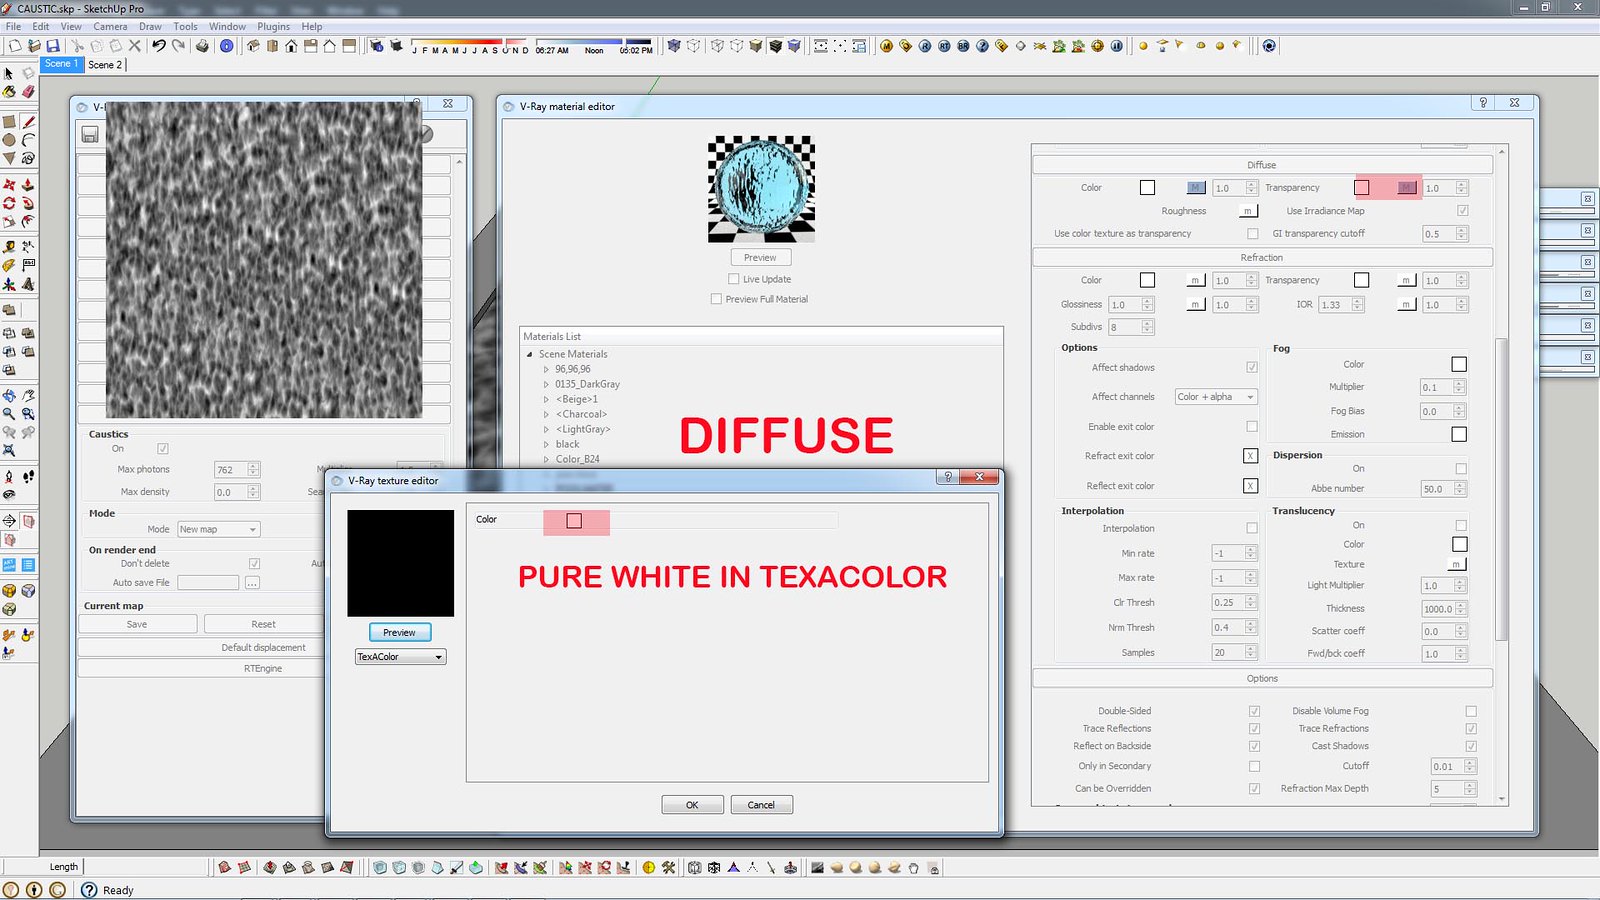
 in transparency layer M attached texAcolor and change pure white
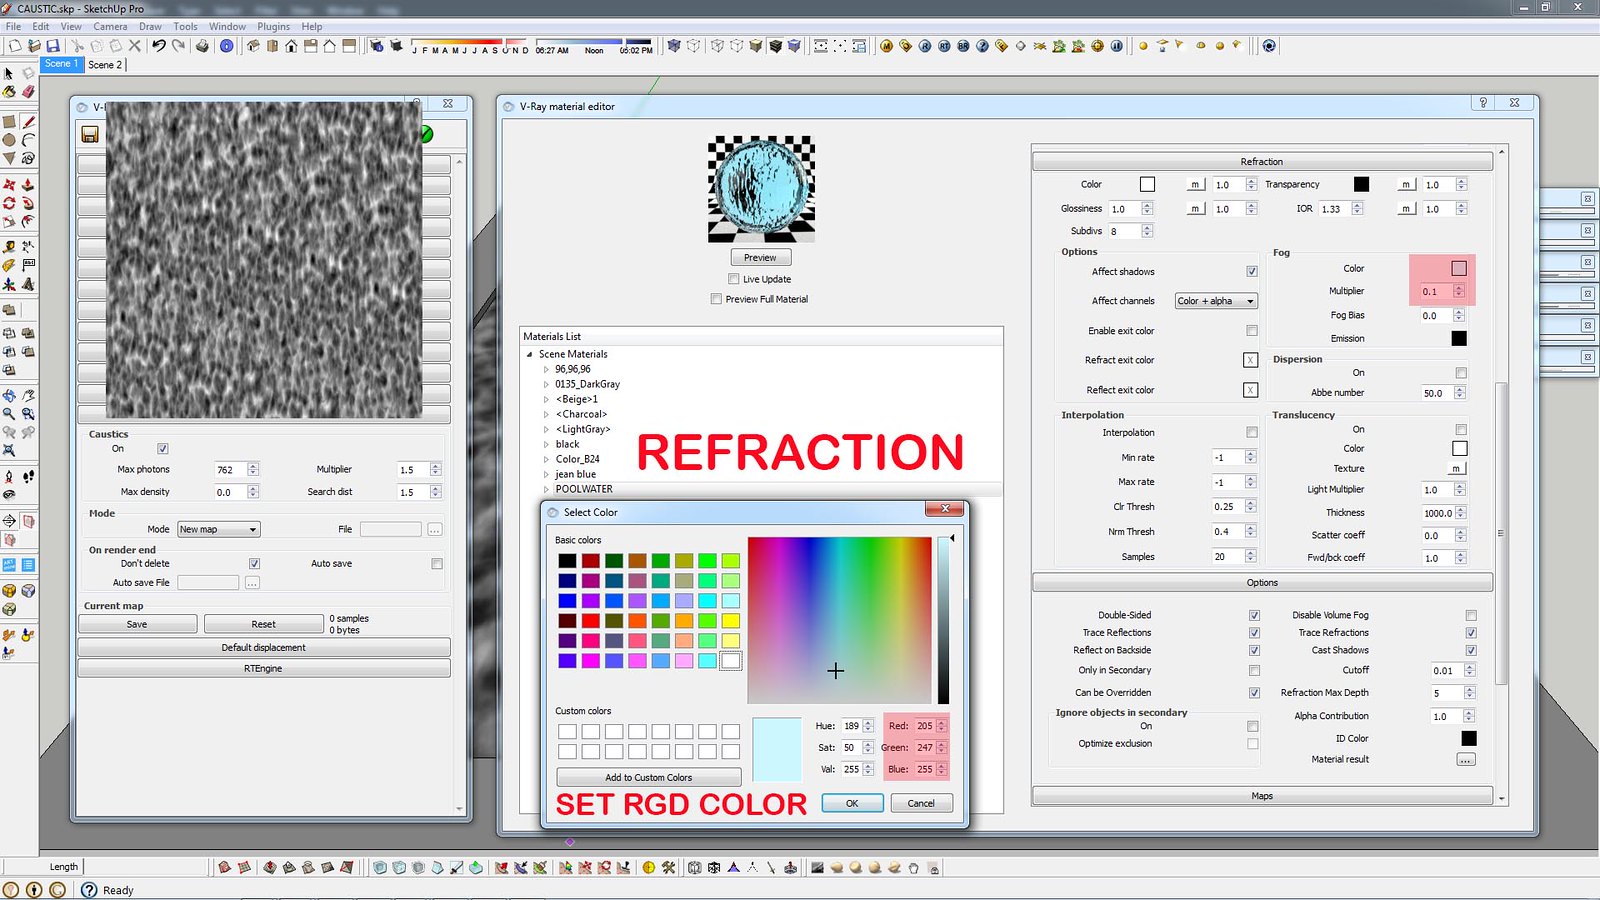
add refraction set IOR also 1.33 and set Fog color RGB 205,247,255 and change mult from 1 to 0.1 ( this is the tint color multiplier higher value produce darker color tint lower value produce lighter color tint ) :)
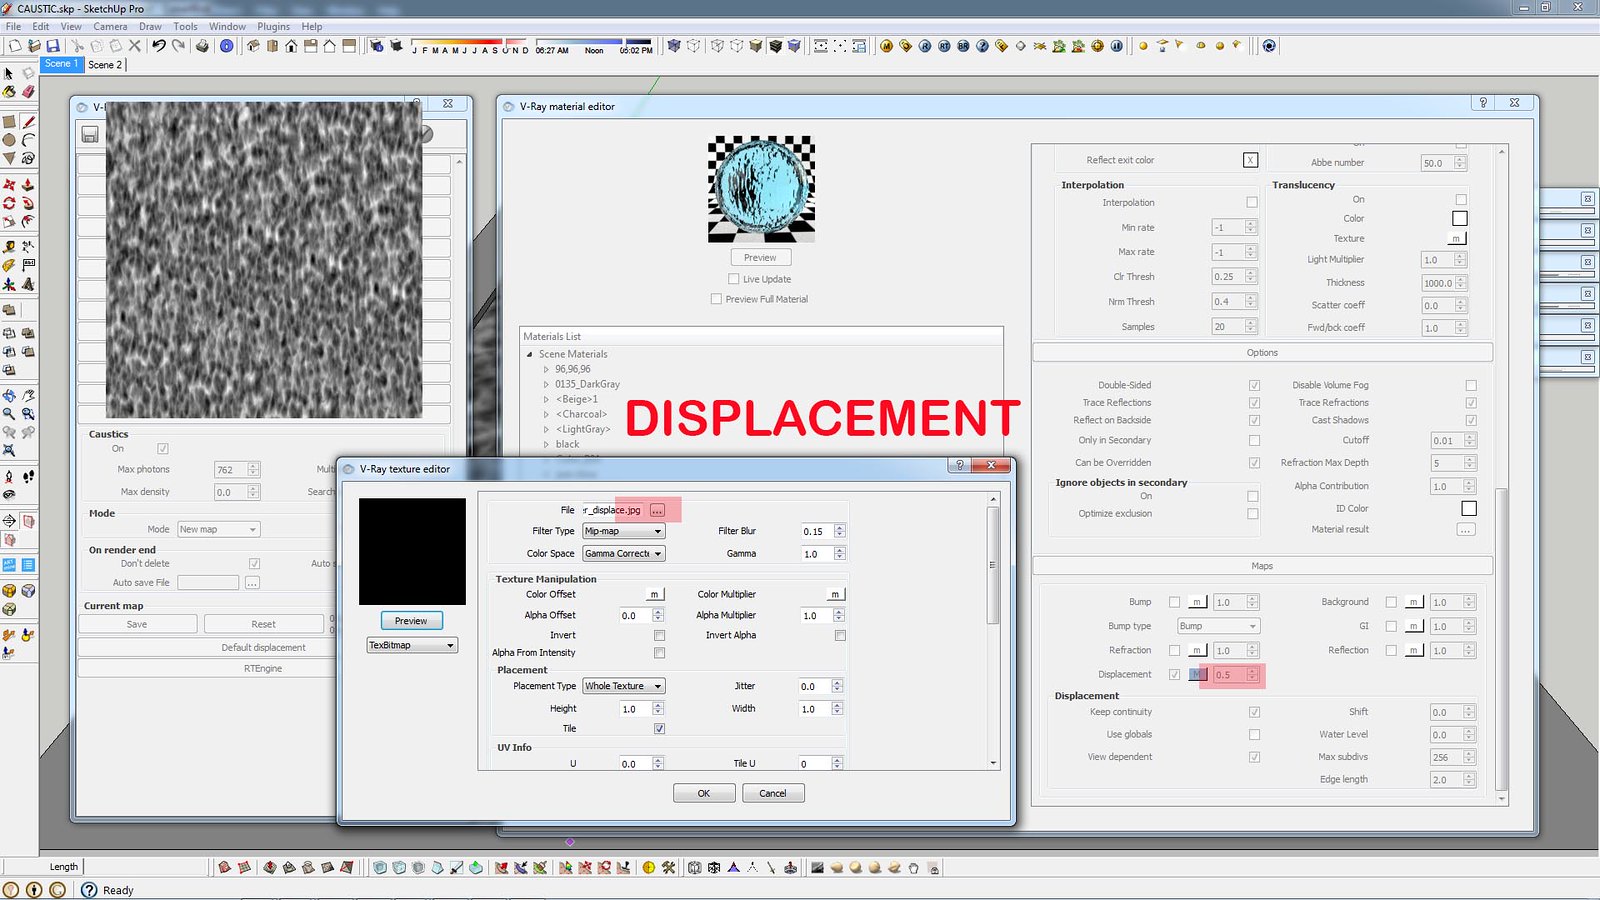
add displacement using same texture displacement with 0.5 value

many thanks and I hope you enjoy and keep on practicing. visoft and poolwater vismat

Thursday, October 30, 2014

Glass Vismat & Omni Lights Shadow setting . . . skp vray 2

GLASS VISMAT | MATERIAL
https://farm4.staticflickr.com/3947/15665106175_88ef62e288_o.jpg 

4shared  -  GLASS - 1     |     GLASS - 2     |     GLASS - 3     |     GLASS - 4
    
mediafire  -  GLASS - 1     |     GLASS - 2     |     GLASS - 3     |     GLASS - 4      

OMNI SHADOW SETTING
https://farm8.staticflickr.com/7570/15479524100_08f8f70653_o.jpg
https://fbcdn-sphotos-e-a.akamaihd.net/hphotos-ak-xpa1/t31.0-8/10604081_713159955434278_4059049476809027166_o.jpg

Thursday, August 28, 2014