s h o r t f o l i o . . .


https://farm6.staticflickr.com/5580/14769093690_4cb4c5afa8_o.jpg
                   
That's only my listed, work in progress and practice personal work, others are not to be published due to copyright ownership.

Thursday, July 26, 2018

The Farm Pool … lumion animation

"The Farm Pool" - Relax and get away from the crowds, heat, noise and queues. Enjoy a day of nature, incredible views, friendly people, great foods and wine! workflow : sketchup + LUMION 8 sample animation + SONYvegaspro | you can check here - IMAGE RENDER   
Music Background : Fieldfare Thrush, River Current Mediun, Wishful Thinking and Wind Medium.

Sunday, July 22, 2018

The Farm Pool ... Lumion render

"The Farm Pool" - Relax and get away from the crowds, heat, noise and queues. Enjoy a day of nature, incredible views, friendly people, great foods and wine! workflow : sketchup + lumion8


DAY                                                            NIGHT

Wednesday, July 18, 2018

LUMION EFFECT STACKs (lme)...SAMPLE

This stacks are my personal setting according to my scene setup and orientation of sun and sky in every angle using different kind of effects, hope you can try it and if you want just check below and load directly to your lumion.
This process is easy in Lumion, nevertheless you can make it even faster by re-using previous effects. Lumion allows you to copy/paste individual effects and combinations of effects (called effect stacks) for use in different images or animations. You can do this by either copy-pasting in a single project or by saving and loading between one Lumion project and another. This helps save even more time in achieving high quality images, movie clips or 360 panoramas.


LUMION EFFECT STACKS (lme)_2

HINT : after render in lumion, open the render image with stack 2 lme in photoshop and overlay stack 1 lme with 20 percent opacity and check the difference.

check all my lumion render - HERE

Wednesday, July 11, 2018

Autocad to Coreldraw . . . Tips and Tricks

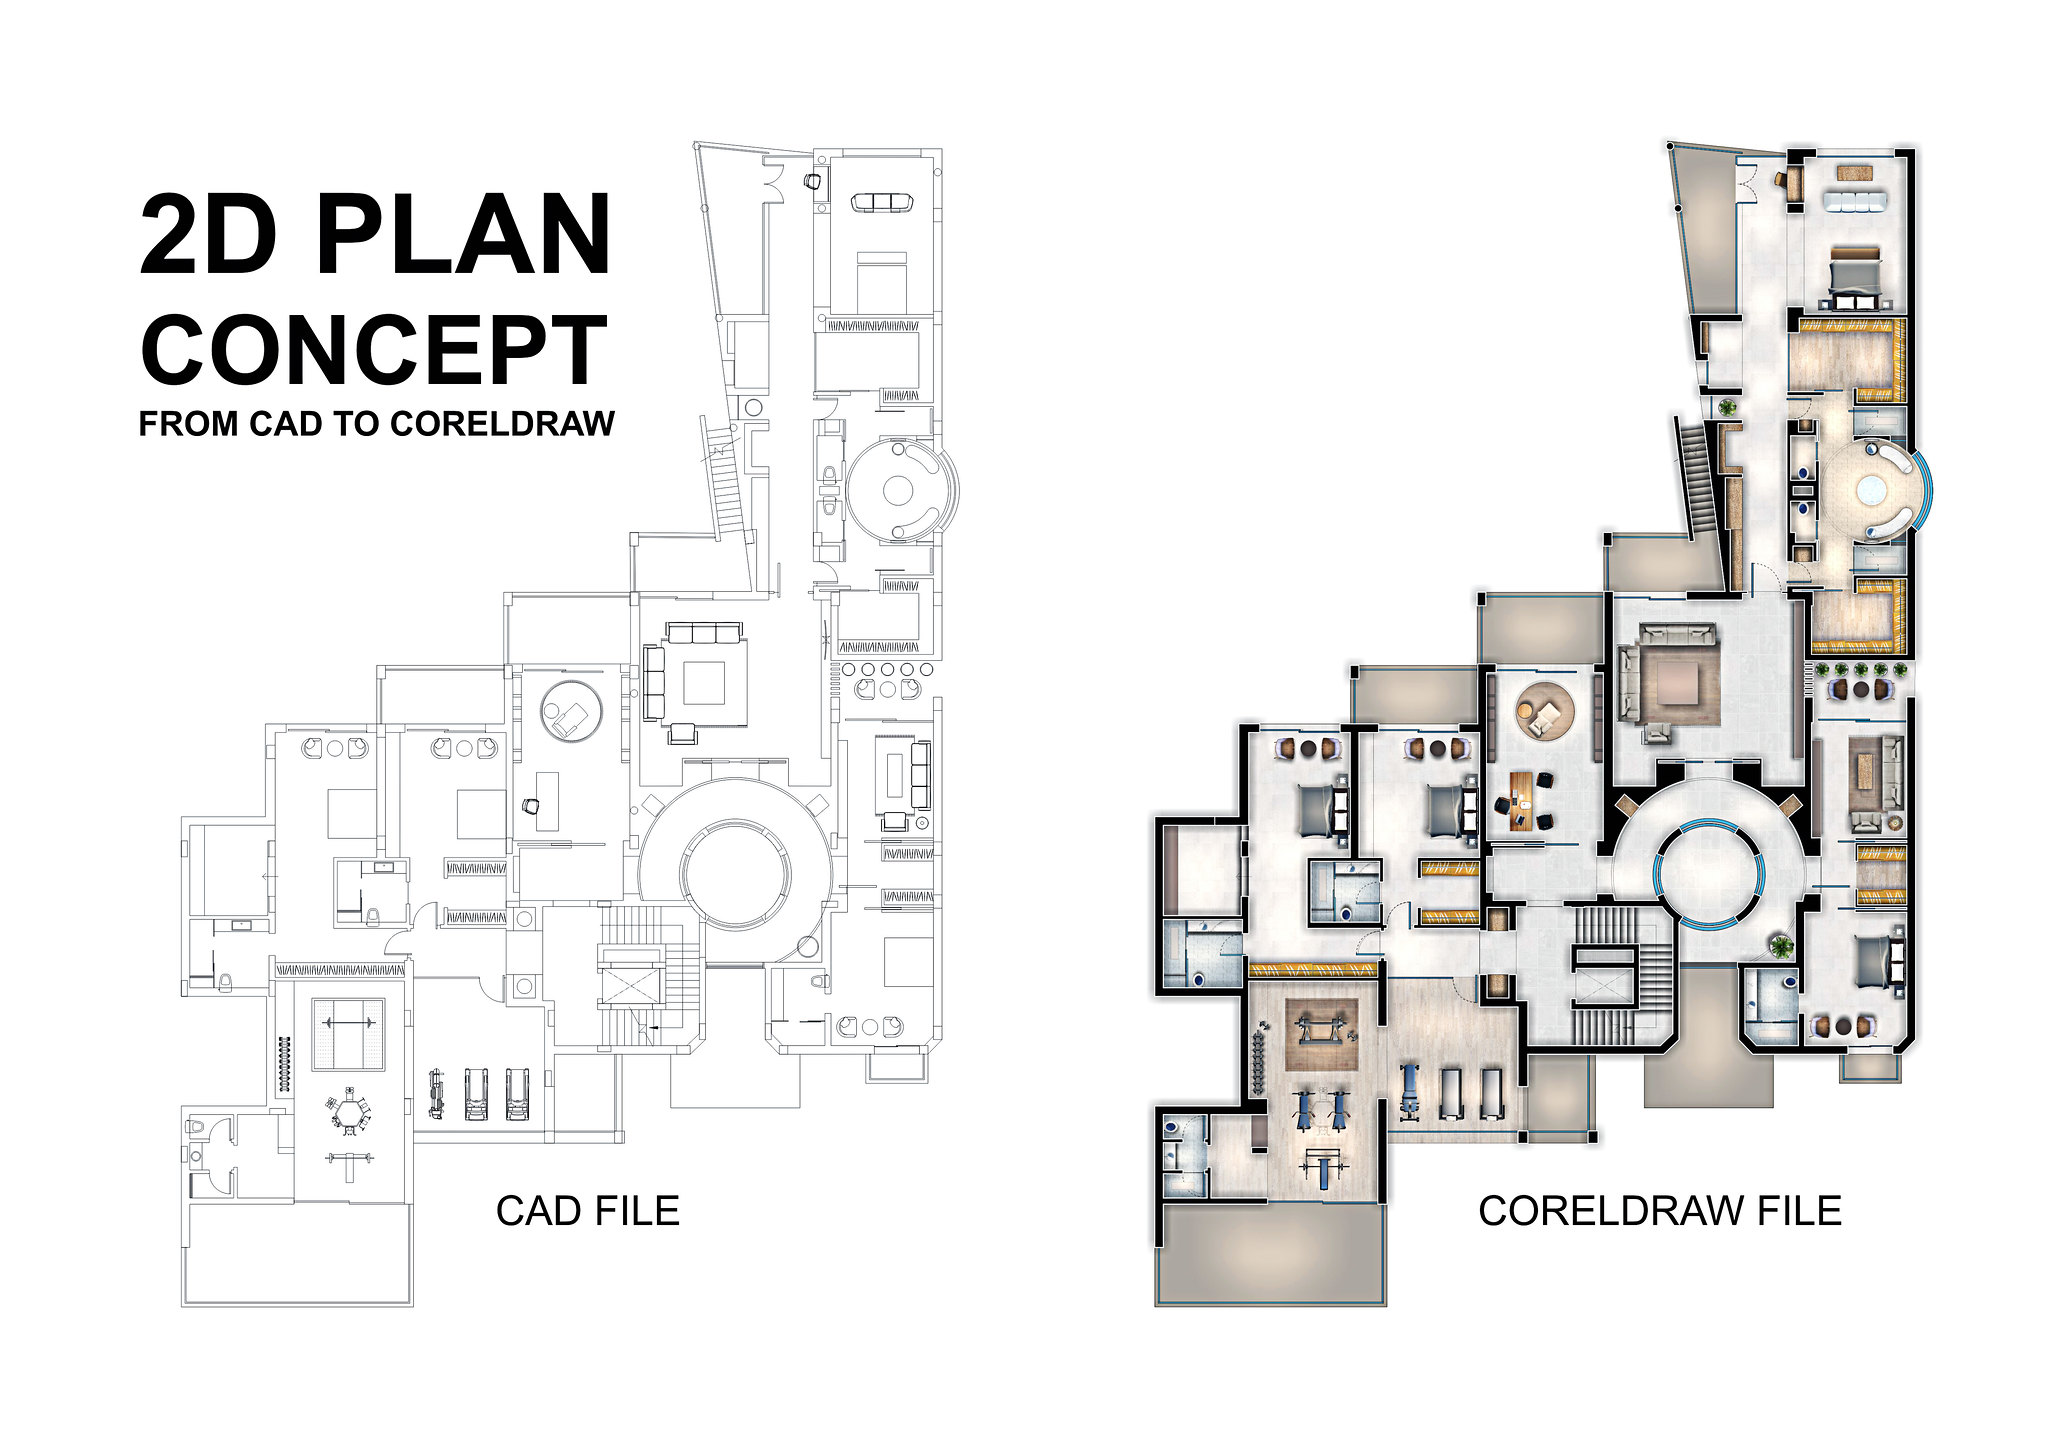
To import an AutoCAD Drawing Database file (DWG) or AutoCAD Drawing Interchange Format (DXF)
In CorelDraw - Click File  Import and Locate the folder in which the file is stored.
Choose DWG - AutoCAD (*.dwg) or DXF - AutoCAD (*.dxf) from the list box next to the File name box. - Click the filename and Click Import.
From the 3D projection list box in the Import AutoCAD file dialog box, choose a plane projection of a three-dimensional object as seen from a given focal point. If you want to reduce the number of nodes on the imported object, enable the Auto-reduce nodes check box.

In the Scaling area, enable one of the following options:
Automatic — scales the drawing using the scale of the AutoCAD source file
English (1 unit = 1 inch) — lets you scale the drawing in inches
Metric (1 unit = 1 mm) — lets you scale the drawing in millimeters
Click OK.

Versions of CorelDRAW (10, 11, 12, X3, X4...X8) directly support import of DWG files (in older AutoCAD formats). Due to the complexity of the DWG format this import might be unreliable - so convert your drawing data rather via the exchange formats DXF, WMF, EPS, or PLT (HPGL). All these formats can be exported from AutoCAD and reliably imported into CorelDRAW.
Similarly for backward conversions of .CDR into .DWG files, do not use the DWG export offered in CorelDRAW. It does not create official DWG-format files and such "forged" drawing files may cause problems during further processing. Again, use rather the AutoCAD text format - DXF, or WMF.
In the New version of Corel Draw you can copy and paste directly the dxf / dwg file format...by copy-paste you will get vectors in Corel. The linetype and thickness are preserved.

After you open the DXF file in Corel Draw click a line. If this will cause all the line to be selected press CTRL+U to ungroup them. Select all the lines and use the Outline Tool to change globaly the thickness to Hairline or to other value as you need.