s h o r t f o l i o . . .

Thursday, August 30, 2012
Monday, August 27, 2012
Removing fringe pixels from a selection in photoshop...
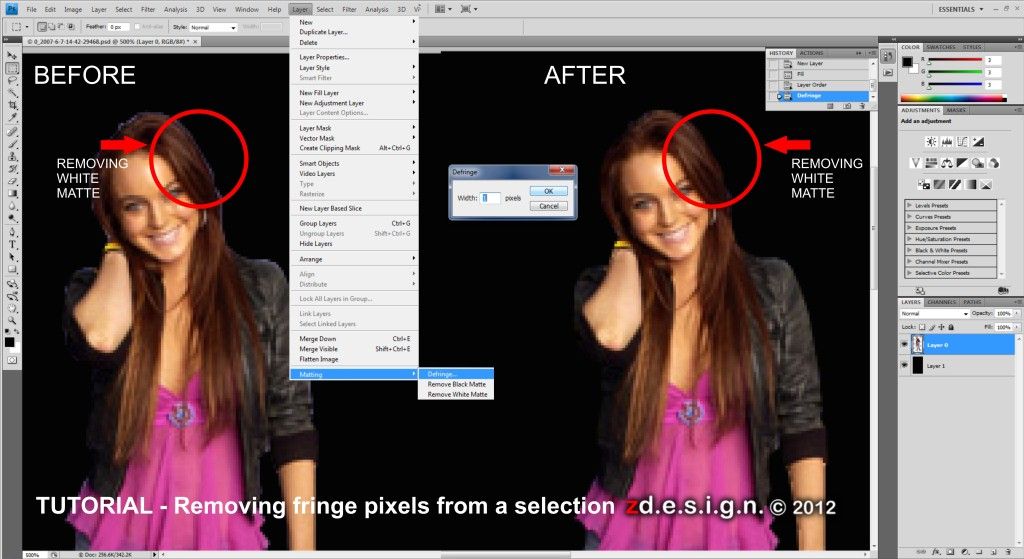
When you move or paste an anti-aliased selection, some of the pixels surrounding the selection border are included with the selection. This can result in a fringe or halo around the edges of the pasted selection. These Matting commands let you edit unwanted edge pixels:
- Defringe replaces the color of any fringe pixels with the colors of nearby pixels containing pure colors (those without background color). For example, if you select a yellow object on a blue background and then move the selection, some of the blue background is selected and moved with the object. Defringe replaces the blue pixels with yellow ones.
- Remove Black Matte and Remove White Matte are useful when you want to paste a selection anti-aliased against a white or black background onto a different background. For example, anti-aliased black text on a white background has gray pixels at the edges, which are visible against a colored background.
To decrease a fringe on a selection:
- Choose Layer > Matting > Defringe.
- Enter a value in the Width text box for the distance to search for replacement pixels. In most cases, a distance of 1 or 2 pixels is enough.
- Click OK.
- Choose Layer > Matting > Remove Black Matte or Layer > Matting > Remove White Matte.
Fotosketcher oil painting parameters...
I make a simple tutorial on how to achieve a nice oil painting output using fotosketcher...try it and make your own style.

it's nice and easy check here http://fotosketcher.blogspot.com/
Sunday, August 26, 2012


Thursday, August 23, 2012


Wednesday, August 22, 2012

Thursday, August 16, 2012

Wednesday, August 15, 2012
Monday, August 13, 2012

Monday, August 6, 2012
Left & Right Brain . . .
Awesome illustrations, cool ads, deliciously informative

Mercedes Benz: Left Brain-Right Brain
Sunday, August 5, 2012

Wednesday, August 1, 2012

Subscribe to:
Posts (Atom)