E p
i c - During
middle ages, the bridge connecting the way for the two villages are important
especially transporting product or exchanging goods and services without using
money, and in that case there is no complete communication system if there is
no bridge. That's why some skilled workers or town's masons managed to build it
proving themselves to be skillful engineers in that time by laying foundations
for this beautiful arched bridge where the river flows all over a year ... This
is the story behind of all those things happen on my simple scenario.
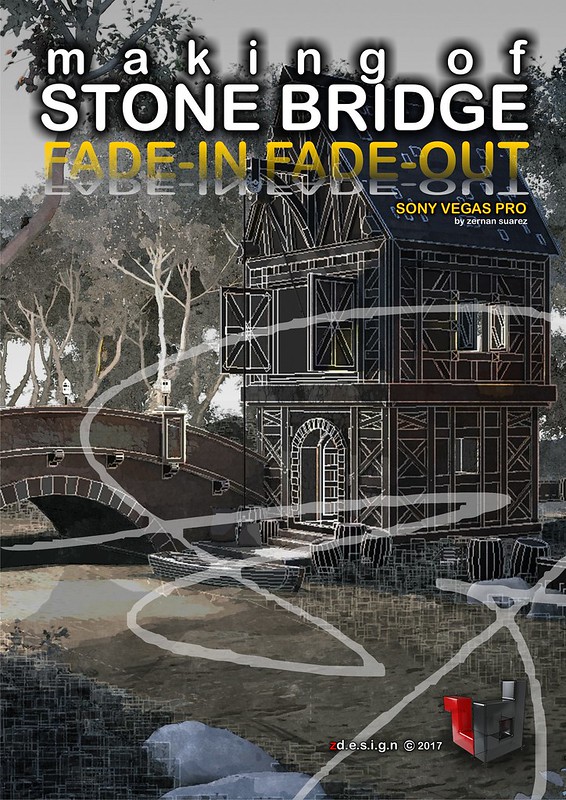
How
do I start . . .
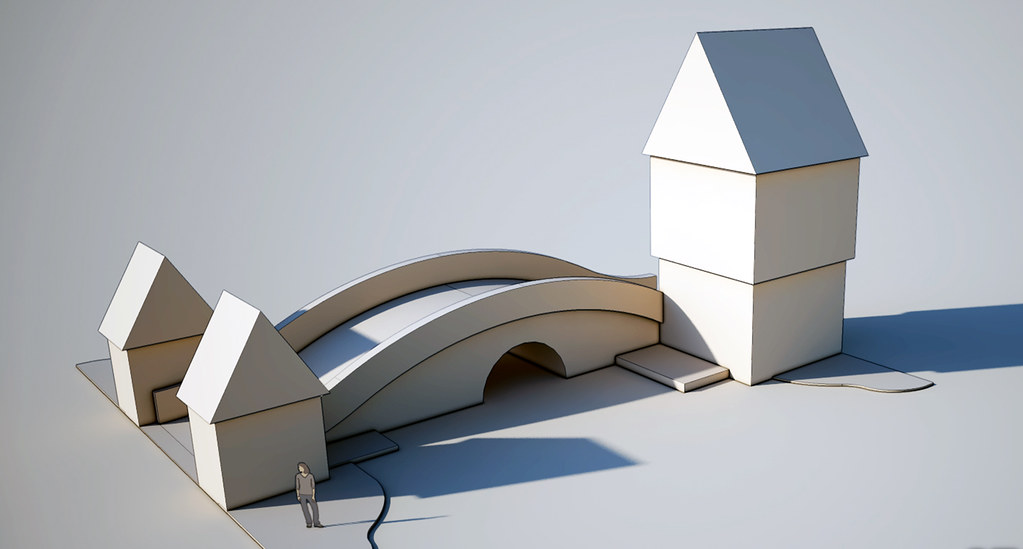
At
first make a simple blocking of shapes, a shapes that guide to make detail and
accessories
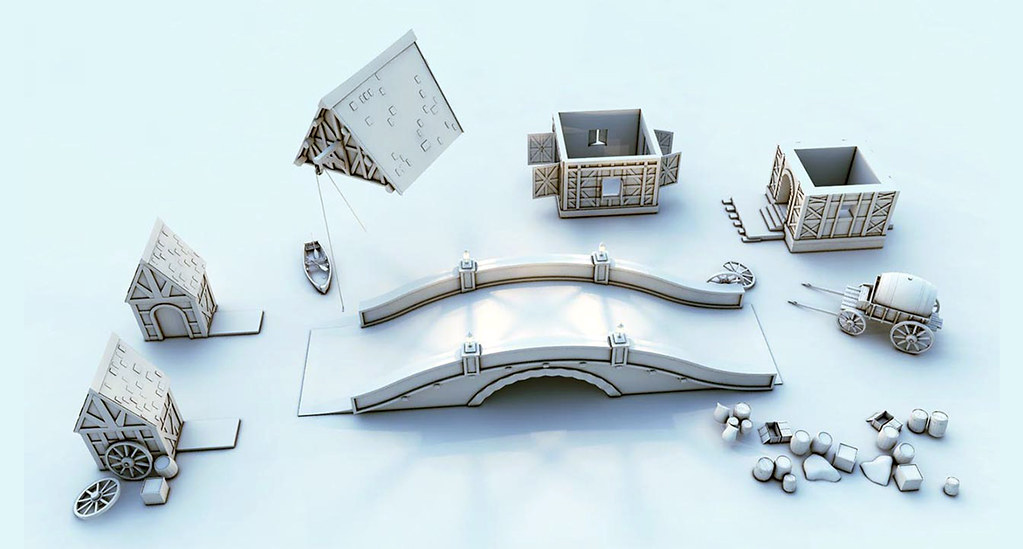
Here’s
my detailed exploded parts showing all the lines, arch - curved structure and
accessories.
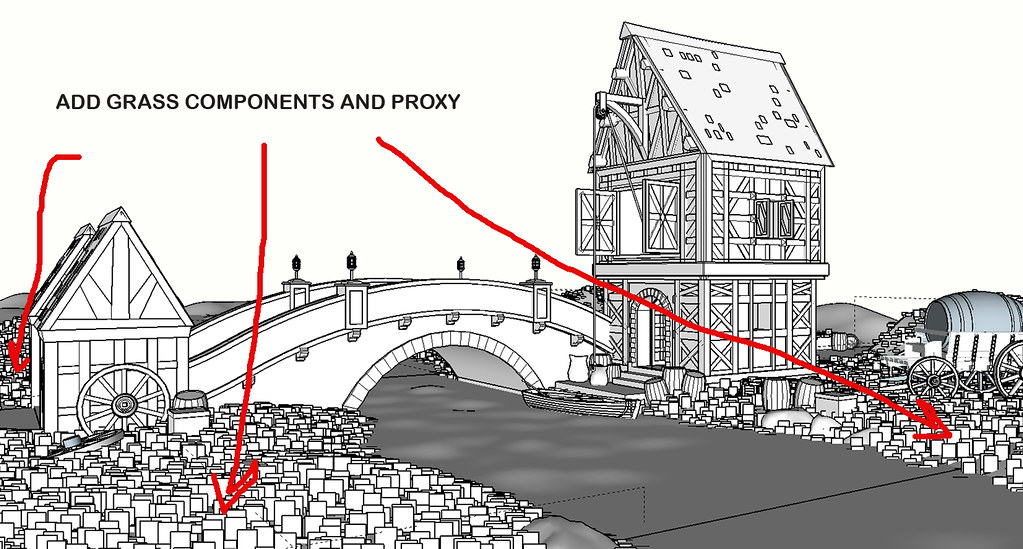
Completing
scenario by adding connecting roads, river with flowing water and dramatic multi-level
land surface. In these scene I render with “material override” and “ambient
occlusion-AO”, uncheck the water material “can be overridden” in options under
v-ray asset editor - just to show only water not to be override. V-ray override
material is a great way of previewing and check your lighting intensity.
Importing
proxy and make fur command
Grass
and trees proxy
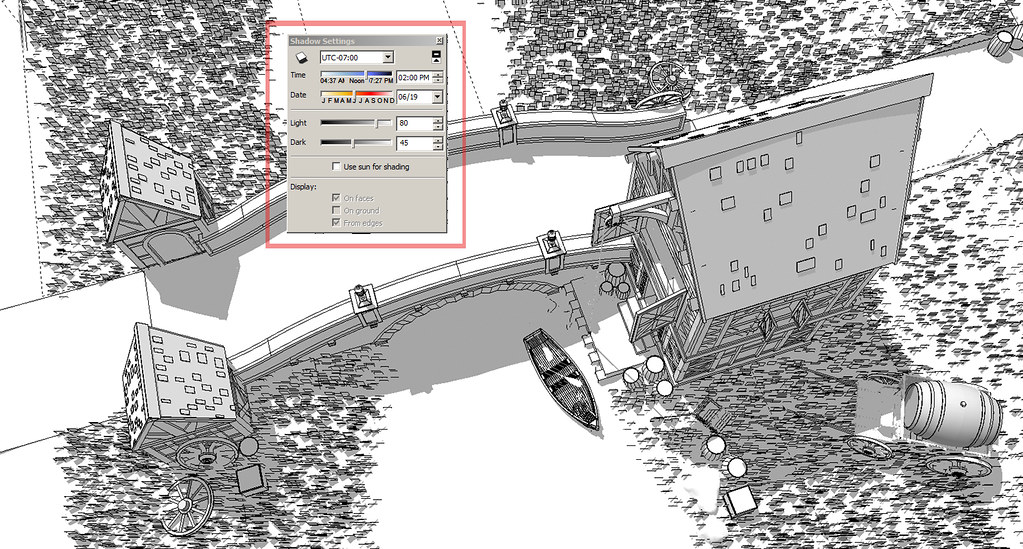
Projecting sun shadow based on the scene
Try this feature – Turn
on the sun: The Shadows feature enables you to see
how the sun changes the way a building looks on different days throughout the
year, and at different times of day. To use this feature, in the tray
area, open the Shadows panel
and select the Use Sun for Shading checkbox,
as shown in the following figure.
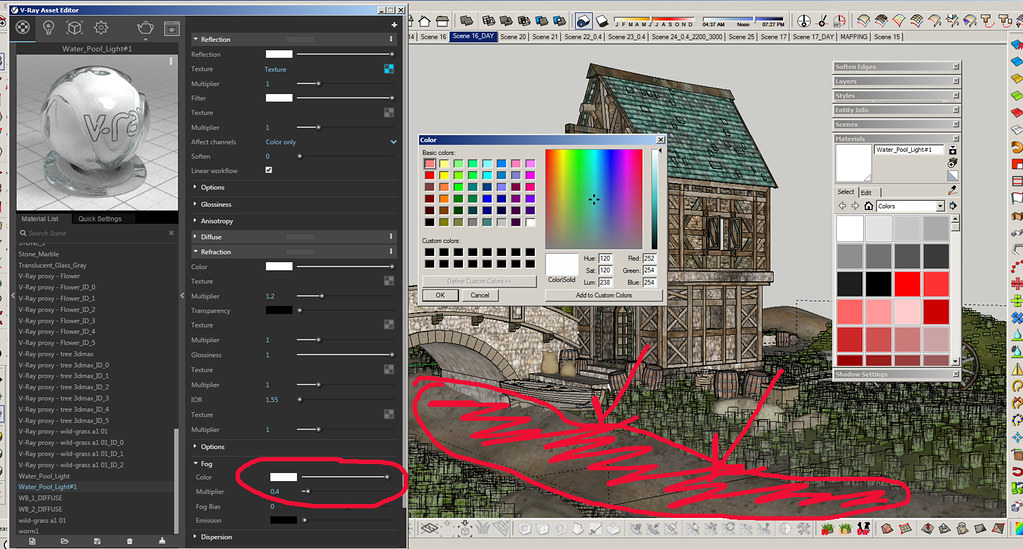
Flowing water – 3.4 Vray material
I know that some of us know about vray material on how to
use it and adjust it in vray material editor... and In this case I need to jump
on to my process, and focus on water by adding green tint to look fresh by
adjusting fog color – just follow RGB color R:252 G:254 B:254 and multiplier
0.40 - Hint : less value of multiplier less green tint effect
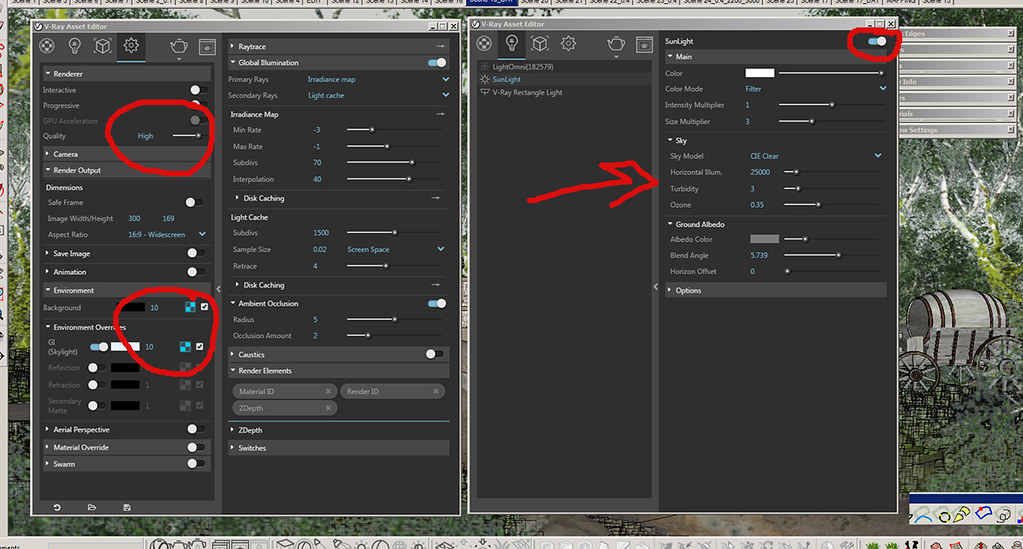
Sun setting / Environment illumination
From default setting I adjust only with red marks, quality
to “high”, BG and GI to 10, “size multiplier” to 3 (for less sharp edge of drop
shadow) and render output “image width/height to 300 x 169, check “material
override”.
Hint : On final render, I always render small render output
, why? save parsing time.
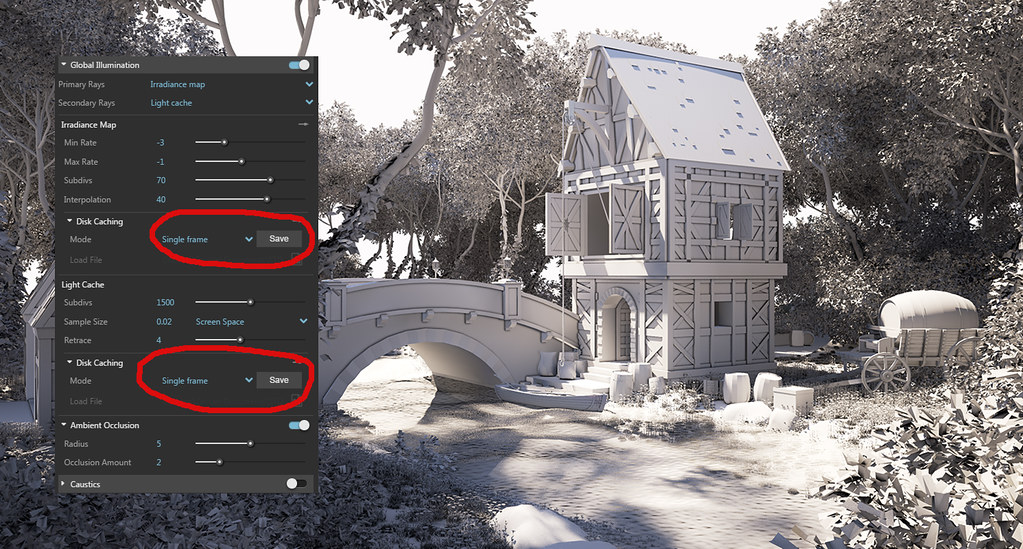
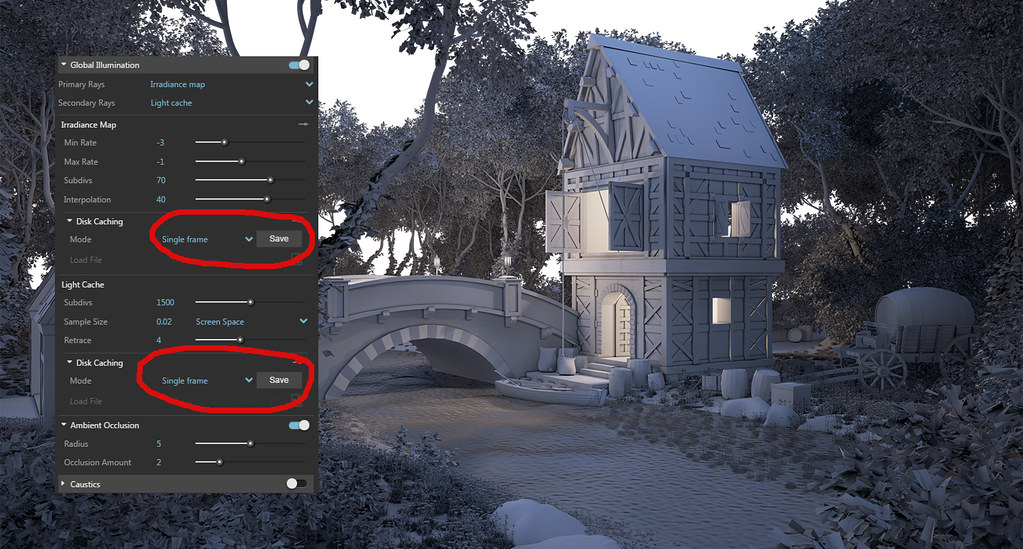
After finish render with small output, save the
“IR-irradience map” and “LC-light cache” under “Disk Caching” and reload it
again by pressing “from file” under “Disk Caching” for final rendering. From
here you can now raise up all in high adjustment. From render output 300x169
make it 3000x1690 and uncheck “material override”.
And “HIT RENDER”
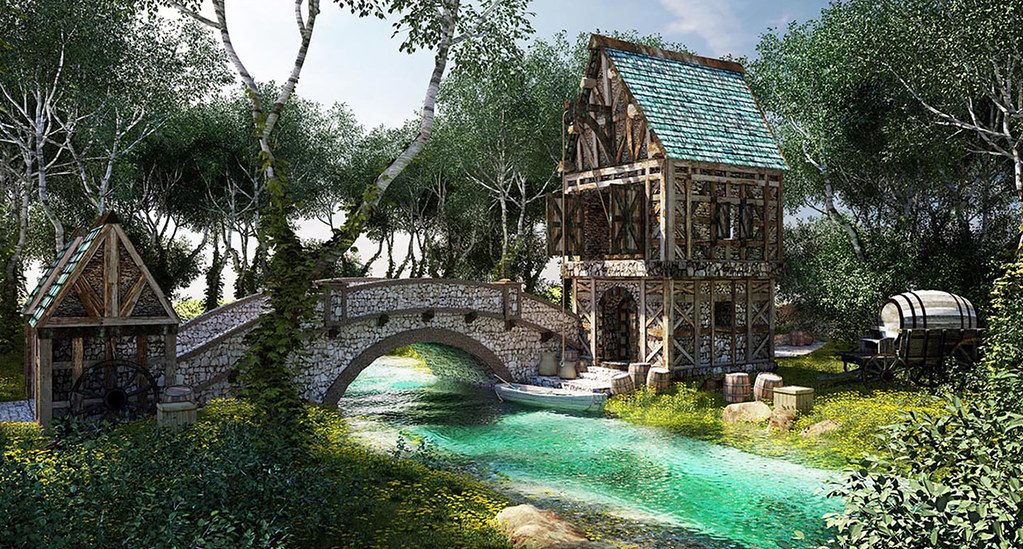
RAW RENDER OUTPUT
It shows the green tint effect on water here.
J
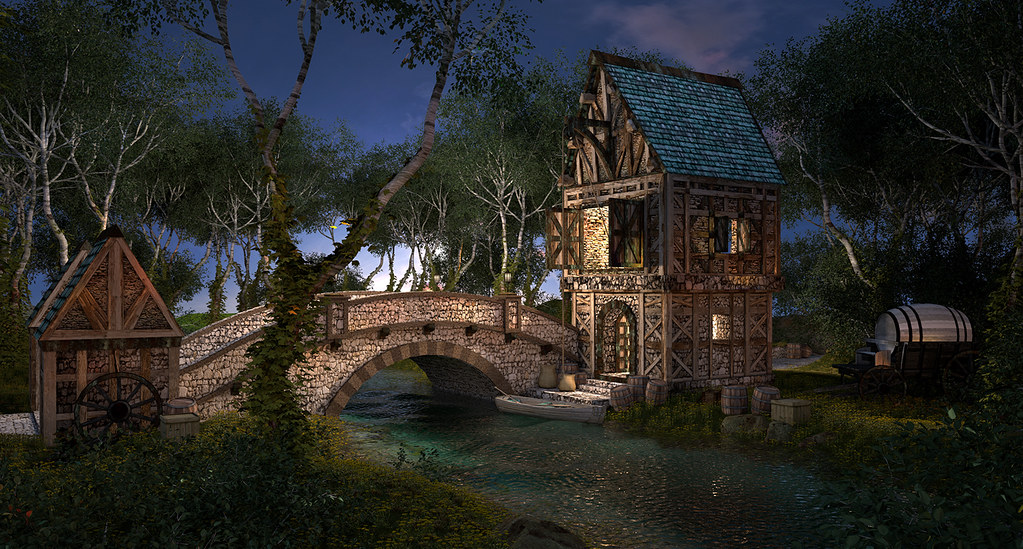
ADJUSTED
FINAL RENDER ( photoshop post
process )
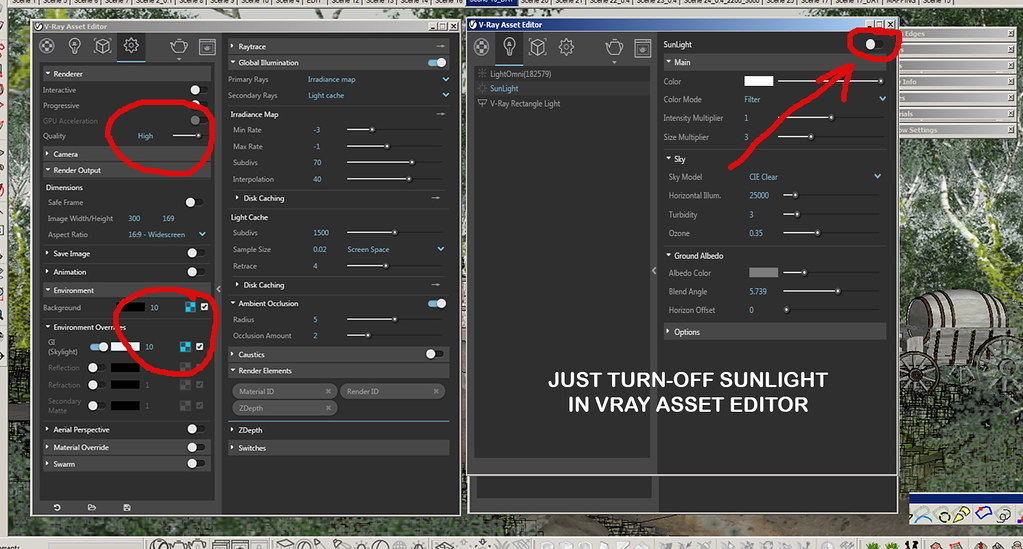
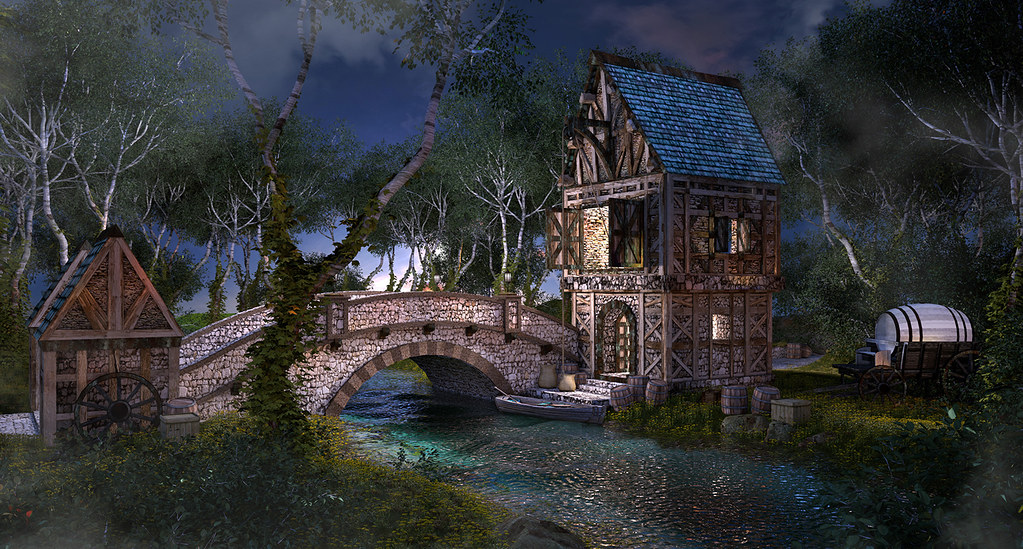
Render night scene using HDRI / EXR
Everything are the same just (uncheck or disable the sunlight)
and render output “image width/height to 300 x 169, check “material override”.
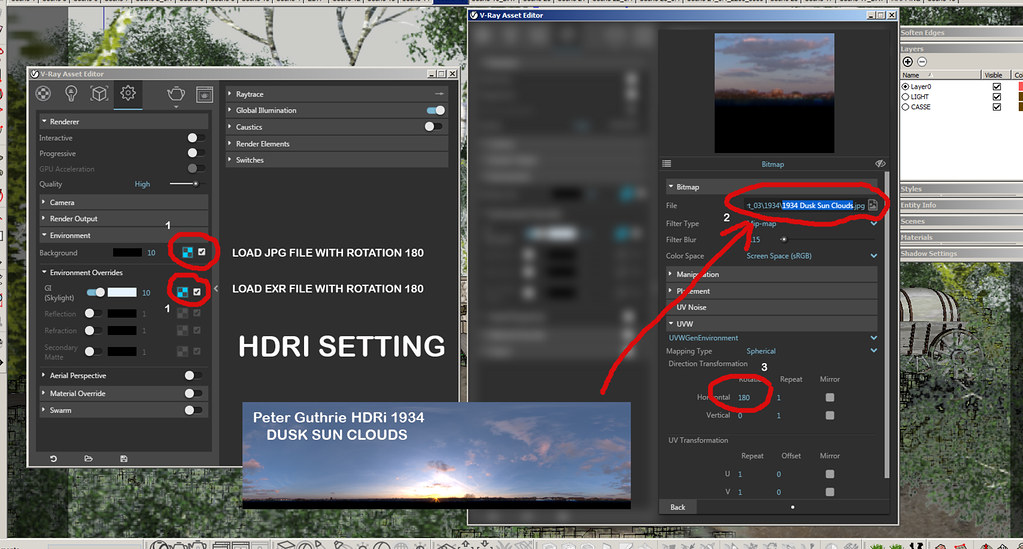
First of all – thanks to Peter Guthrie’s HDRI
1-Just
reload HDRI / EXR to environment
2-Since I want the sun location not in front of my camera,
change UVW horizontal rotation to 180 to place sun location at my back
Again, after finish render with small output, save the
“IR-irradience map” and “LC-light cache” under “Disk Caching” and reload it again
by pressing “from file” under “Disk Caching” for final rendering. From here you
can now raise up all in high adjustment. From render output 300x169 make it
3000x1690 and uncheck “material override”.
Compare the Difference of
natural SUN light and HDRI Illumination
RAW RENDER OUTPUT
RAW RENDER OUTPUTADJUSTED FINAL RENDER (
photoshop post process )
 GOD BLESS
 - Thanks
and hope it helps a lot.